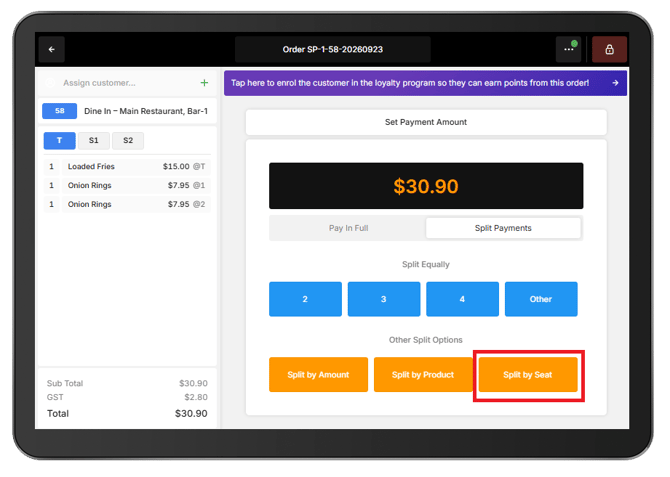
Seat Management in Oolio One POS allows items on a dine-in order to be assigned to individual guests using seat numbers. This helps staff identify which guest ordered each item, organise preparation dockets by seat, and split the bill by seat when taking payment.
Items that are shared by the table can remain unassigned.
Before starting
Before using Seat Management in POS:
- A Floor Plan with Sections and Tables must be configured.
- The Floor Plan and Dine In order type must be enabled.
- Seat Management must be enabled in Back Office.
See 🔗 Configure Seat Management for setup instructions.
Step 1: Start a table order
- From POS, open Floor View.
- Select the required table.
- Enter the number of guests when prompted.
For example, entering 3 creates three seats for the order.
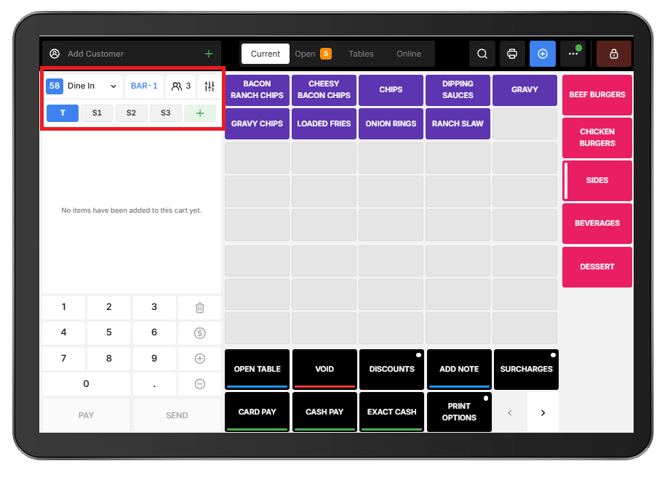
The cart displays:
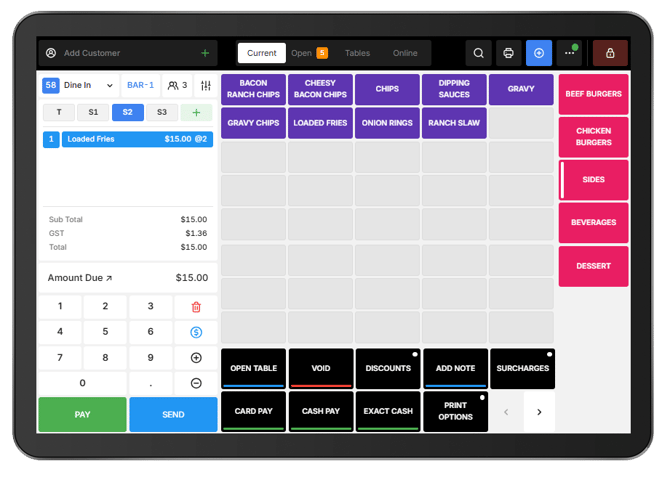
- T: The full table order, including items not assigned to a seat.
- S1, S2, S3: The individual seats created from the guest count.
- +: Adds another seat and increases the guest count.
Step 2: Add items to the order
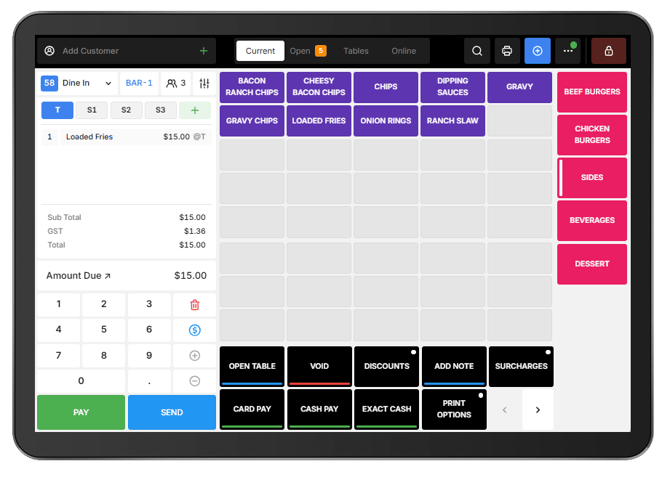
Add the required products to the cart.
Items added to T are not assigned to an individual seat and are treated as shared items.
Step 3: Assign an item to a seat
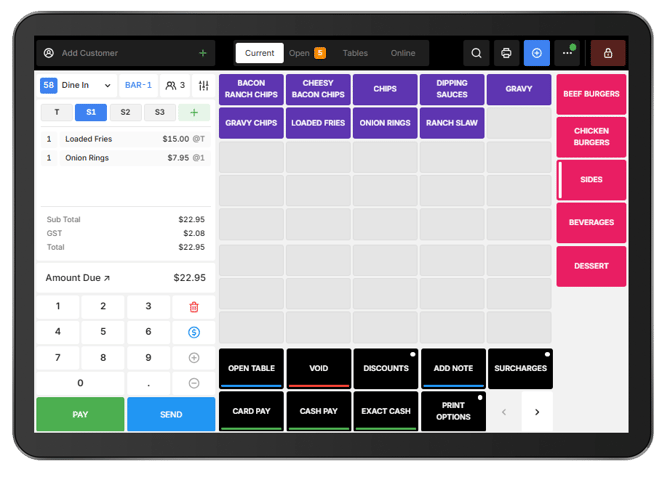
Items can be assigned to a seat while taking the order:
-
Select the required seat number.
-
Add the guest's products. The products are added directly to the selected seat.
-
Repeat for each guest as required.
An existing item in the cart can be assigned to a guest:
- Select the required item from the cart.
- Select the appropriate seat number. The item displays its assigned seat number. For example, @2 indicates that the item is assigned to Seat 2.
- Select T to return to the full table order.
- To move an item to another seat, select the item and then select the new seat number.
Shared items:
-
Leave products assigned to T when they are intended for the whole table rather than an individual guest.
-
Products that are not assigned to a seat are treated as Shared.
-
When preparation dockets print, the seat assignments identify which items belong to each guest, while shared items are shown under T.
Split identical items between seats:
-
If multiple quantities of the same product have been added together, separate them before assigning each item to a different seat.
-
For example, to separate one item from a quantity of two:
-
-
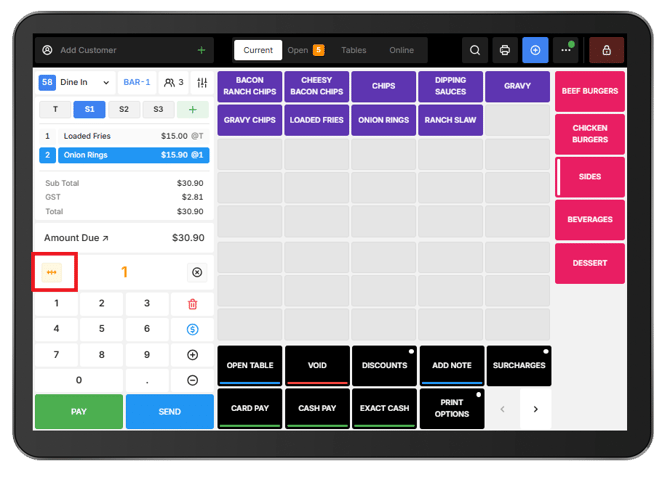
Select the products in the cart.
-
Enter 1 using the number pad.
-
Select the Split icon.
-
-
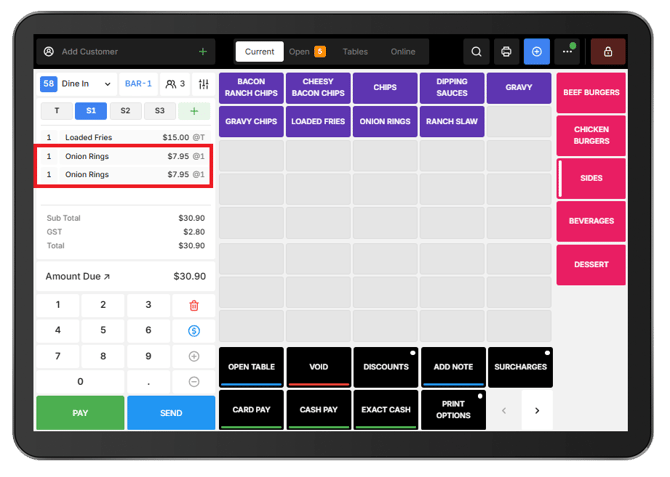
The products now appear individually in the cart and can be assigned to different seats.
Split the bill by seat:
-
When Seat Management is used, the bill can be separated according to the items assigned to each seat.
-
From the payment workflow, select Split by Seat to process payments based on the seat assignments.