
Seat Management allows products on Dine In orders to be assigned to individual seat numbers. This helps staff identify which dishes and drinks belong to each guest without having to confirm who ordered each item during service.
Seat Management is used with the Dine In order type and requires a Floor Plan with sections and tables.
Before starting
Before enabling Seat Management:
- Create a Floor Plan with the required Sections and Tables.
- Ensure the Floor Plan is enabled on the required Device Profile.
Step 1: Enable the guest count prompt
The guest count records how many guests are seated at a table and allows individual seat numbers to be used when adding products to a Dine In order.
- Open Back Office > Settings > Locations.
- Select the required Store.
- Select into Device Profiles and select the Device Profile that has the Floor Plan enabled.
- Under Details, scroll down to Preferences.
- Enable Show Guest Count Prompt for Dine In Orders.
- Select Save.
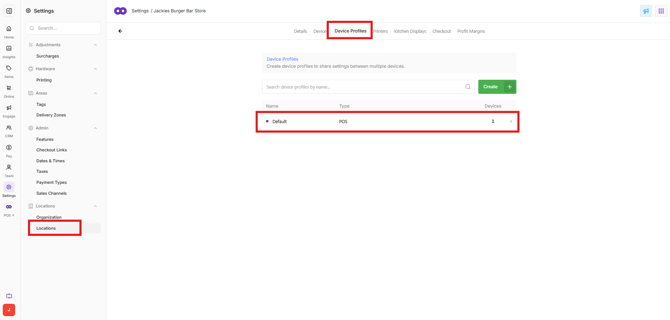
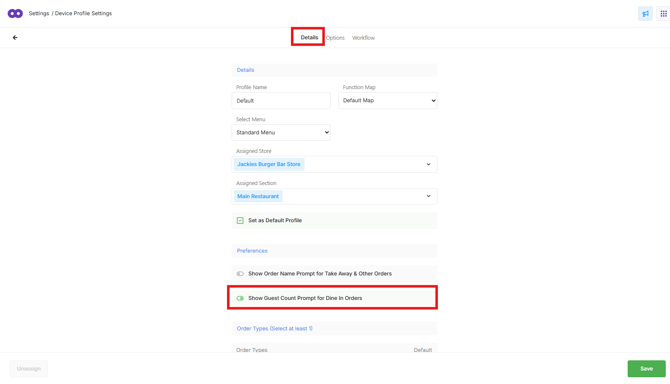
When a table is selected for a Dine In order on POS, the guest count can now be entered.
Step 2: Enable Seat Management
Enable Seat Management on the same Device Profile used for the Floor Plan.
- Open Back Office > Settings > Locations.
- Select the required Store.
- Select the required Device Profile.
- Select into Options.
- Enable Seat Management.
- Select Save.
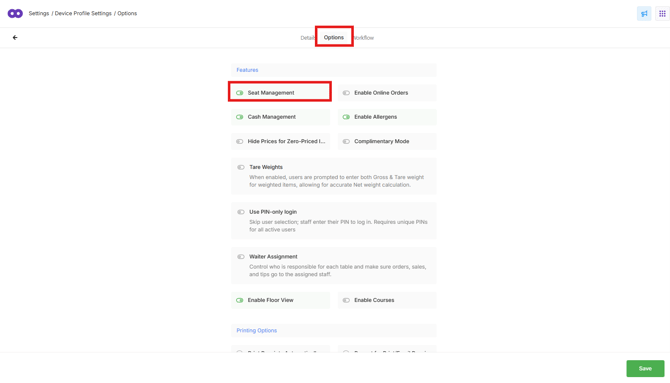
Seat Management is now enabled on POS devices using that Device Profile.
Use Seat Management on POS
With Seat Management enabled, products on Dine In orders can be allocated to seat numbers so staff can identify which items belong to each guest. See this guide for more information - 🔗 Use Seat Management