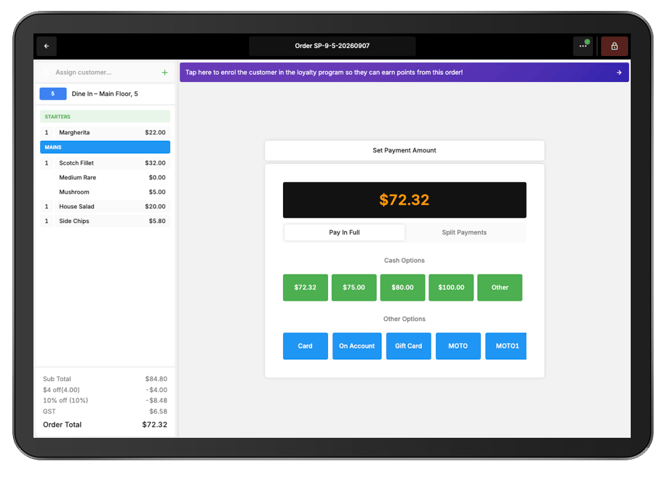
Use the Dine In Order Type to manage table service in Oolio One POS. Orders can be assigned to a table, updated with customer instructions and courses, sent to preparation areas, then reopened throughout service as more items are ordered.
Start a dine-in order
- Log in to Oolio One POS.
- Select the required table.
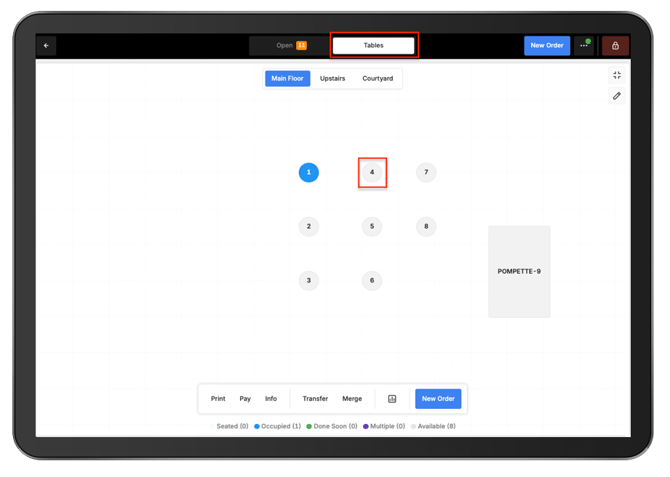
- Enter the number of guests, if prompted.
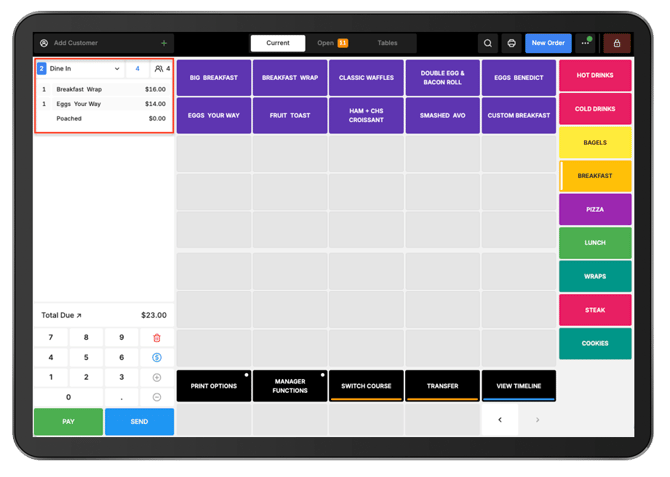
- Select the required products.
- Choose any required sizes, variants, or modifiers.
The selected products appear in the Cart.
Add an item note
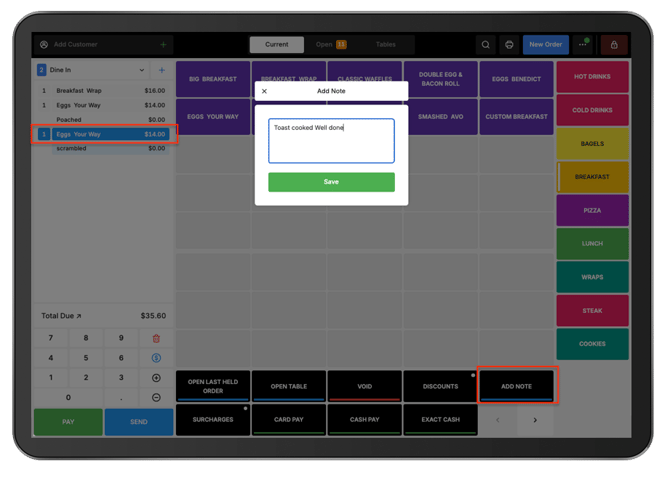
Add a note when an instruction needs to be communicated for a particular product, such as a dietary requirement.
- Select the required item.
- Select Add Note.
- Enter the instruction.
Assign an item to a course
There are two available configurations for using courses in POS:
- Automatic assignment: Products are automatically assigned to their configured Course when ordered in POS.
- Manual assignment: The POS user selects the Course when ordering the product.
When manual assignment is enabled, courses can be selected during the ordering process.
- From the cart, select Add Course.
- The first available course will be added in the cart ie. Starters
- As items are ordered, they are added to the selected course
- At any time, select Add Course, to add additional courses ie. Main, or Dessert.
See 🔗 Create Courses for more information about managing courses.
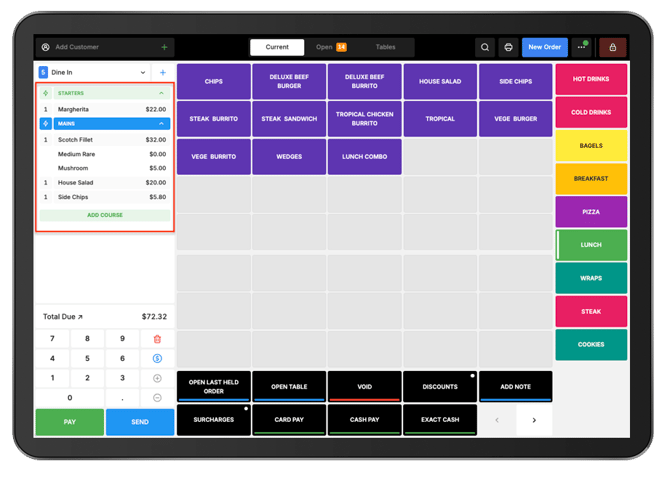
Note: Products can be added to previous course, by selecting the course before adding additional products
Send the order
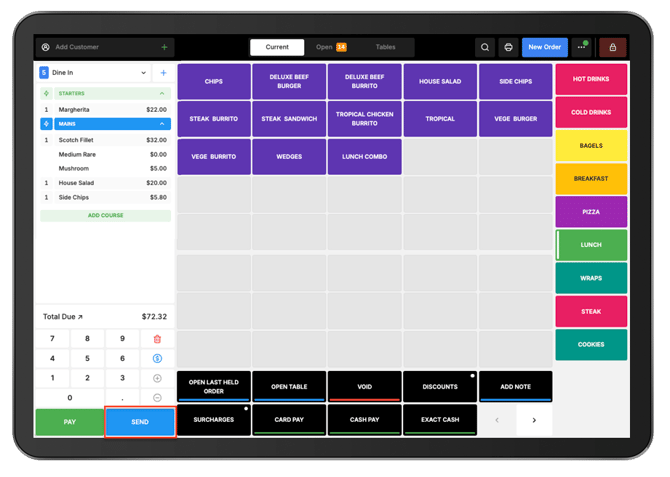
Review the order and any instructions before sending it for preparation.
-
When the order is ready, select Send.
-
The relevant items are sent to their configured preparation areas, such as the kitchen or bar.
Add more items to a table
A dine-in order can be reopened throughout service.
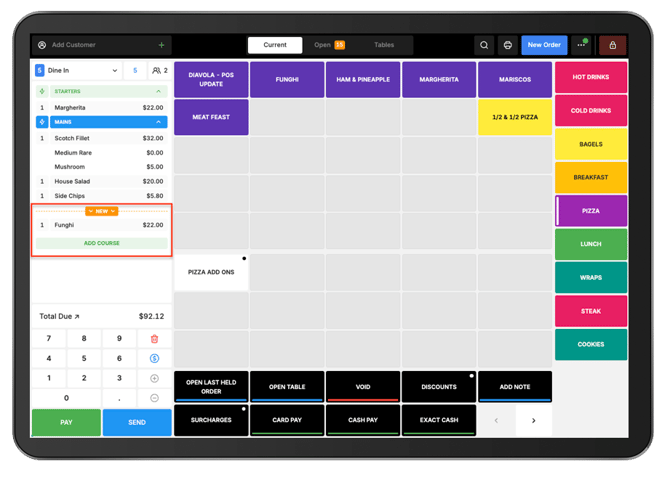
- Select the required table or find the order in Open Orders.
- Add the additional products.
- Select Send.
The newly added items are sent for preparation.
Change an item quantity
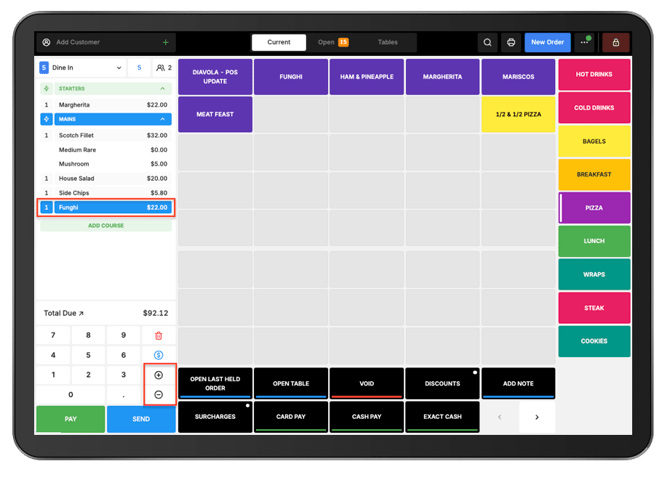
Use the + and - controls to change an item's quantity.
Note: An item that has already been sent cannot be removed by reducing its quantity to zero. Use Void to remove a sent item.
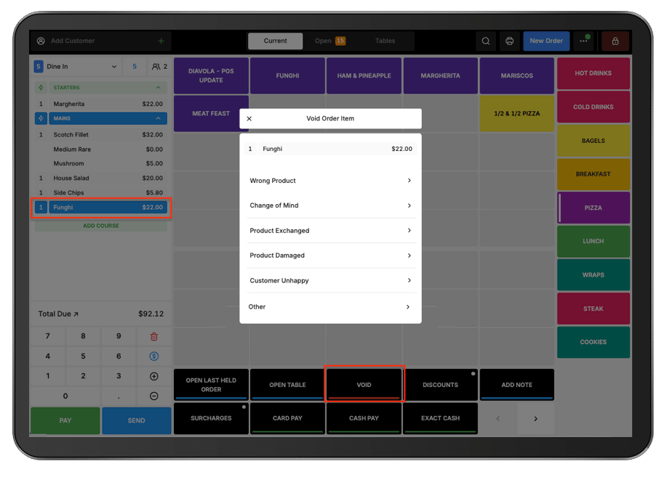
Void a sent item
- Select the item.
- Select Void.
- Select the appropriate void reason.
- Complete manager approval if prompted.
The voided item remains visible with a line through it and a Void message. A void docket prints at the location where the original order was printed.
Take payment
When the table is ready to pay:
- Open the required table.
- Select Pay or an available Quick Pay option.
- Select the required payment method, such as:
- Cash
- Card
- Gift Card
- Manual EFT
- Complete the payment.
- Issue a receipt if required.
- Select Complete Sale.
- Confirm that the order and table have closed.
For customers paying separately, see 🔗 Process a Split Bill