
Each Oolio One user is assigned a user role that determines their level of access to Front of House and Back Office. System user roles provide preset permissions and cannot be edited, while Custom user roles can be created to provide different levels of access based on a staff member's responsibilities.
See 🔗 Creating A New User for information about creating users.
Step 1: View User Roles
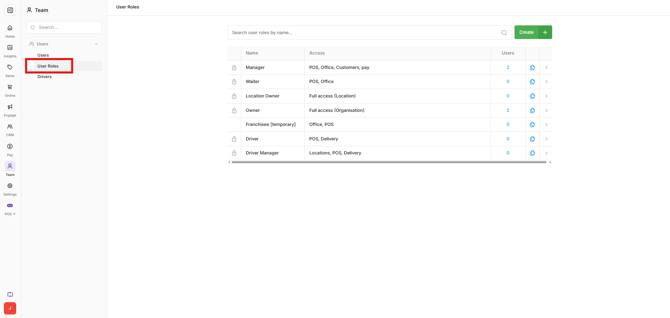
Open Team > User Roles to view the System and Custom user roles available for the organisation.
Each role shows the access assigned to that role and the total number of users currently assigned to it.
Step 2: Review a user role's permissions
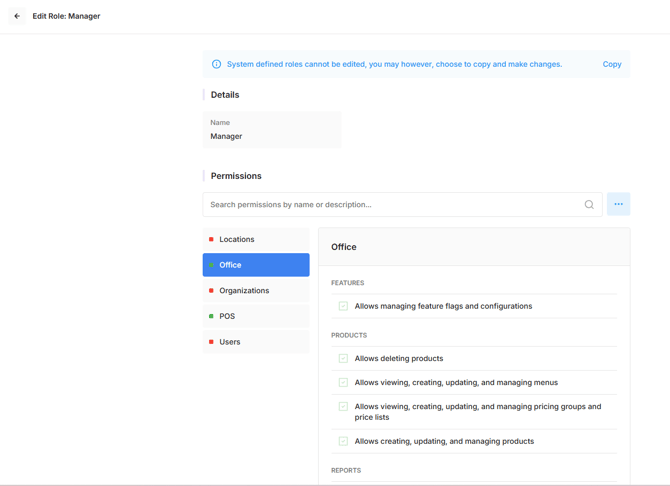
Permissions determine which applications and functions are available to users assigned to a role.
- Open Team > User Roles.
- Select the required role.
- Review the permissions assigned to the role.
Permissions are grouped by application. Select the application headings on the left or use the search field to find a specific permission.
Step 3: Create a custom role
Custom roles can be created from scratch or copied from an existing role. Copying a role can be useful when the new role requires similar permissions to one that already exists.
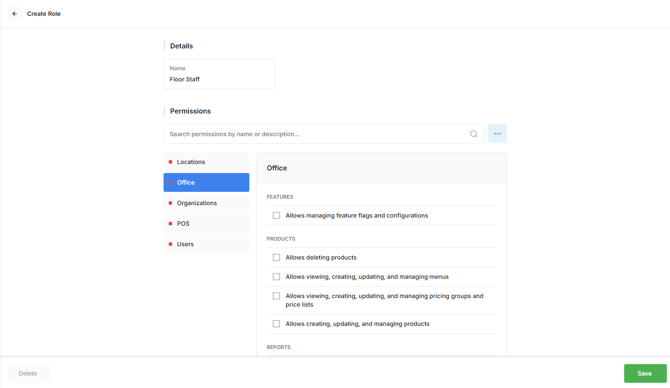
Create a user role from scratch:
- Open Team > User Roles.
- Select Create.
- Name the custom user role
- Work through the application list.
- Select the checkbox next to each permission that should be included.
- Review the selected permissions.
- Select Save.
Warning: A role can be saved without any permissions. Review the selected permissions before saving to make sure the role provides the required access.
Copy an existing user role:
- Open Team > User Roles.
- Find the role to copy.
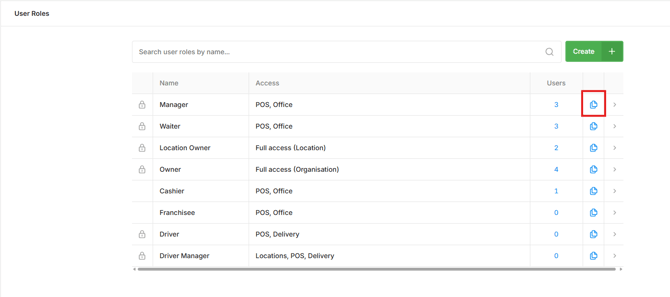
- Select the copy icon next to the role.
- Enter a name for the new role.
- Work through the applications and adjust the copied permissions as required.
- Select Save.
The new Custom role is added with the selected permission set.
Step 4: Change permissions for a custom user role
Update a Custom user role when the users assigned to it require different access.
Note: System user roles cannot be edited.
- Open Team > User Roles.
- Select the Custom role to update.
- Select Edit.
- Work through the applications and enable or disable permissions as required.
- Review the updated permission set.
- Select Save.
The Custom role is updated with the selected permissions.
Step 5: Delete a custom role
Custom roles that are no longer required can be deleted.
Note: System user roles cannot be deleted.
- Open Team > Roles.
- Select the Custom role to delete.
- Select Delete.
- Complete the deletion.
The Custom role is removed. A new role can be created with the same name later if required.
Step 6: Assign different roles by location
A user can have different roles at different locations within the same organisation. This allows access to be adjusted when a staff member has different responsibilities across venues.
For example, a staff member could have a manager user role at one location and a waiter user role at another location.
- Open Team > Users.
- Select the user to edit.
- Select the required User Type for the first instance.
- Add a Location.
- Select the Role from the available list.
- Select the locations where the role should apply.
- Add another role when different access is required for other locations.
- Select the role and applicable locations for each additional assignment.
- Select Save.
The user's access is determined by the role assigned for each selected location.