
Kitchen Display settings control how orders and items appear on Kitchen Display Screens (KDS) in Oolio One. Settings can be adjusted for different kitchen and service stations, including the docket layout, text size, seat numbers, dark mode and how modifiers are displayed.
Before starting
- Kitchen Display must already be configured for the venue.
See 🔗 Configure Kitchen Display for setup instructions. - Confirm which Printer Profiles should route orders to the screen.
- Consider the screen size and viewing distance when selecting the layout and text size.
- Identify whether Seat Numbers need to appear on dockets.
- If configuring modifier styles, identify the modifier keywords that need to stand out during service.
Note: Available settings and layout options can vary depending on the Kitchen Display Screen version and device.
Open Kitchen Display Screen Settings
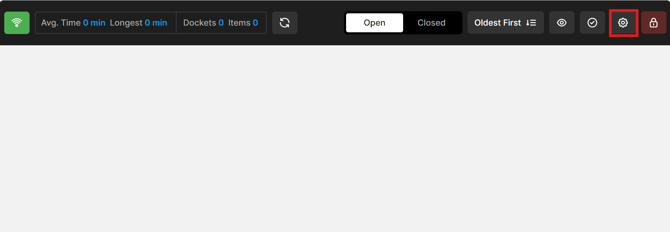
Configuration options are managed directly from the Settings screen.
- Open the required Kitchen Display Screen.
- Select the Settings icon.
- Review the available settings.
-
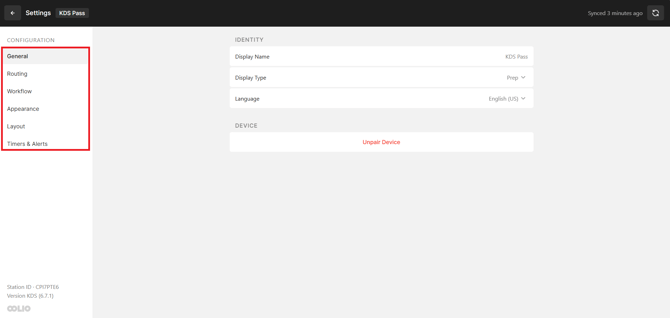
Settings are grouped into:
- General
- Routing
- Workflow
- Appearance
- Layout
- Timers & Alerts
General Settings
Use General settings to identify the Kitchen Display Screen and control its basic configuration.
Display Name:
-
Identifies the Kitchen Display Screen.
- The Display Name can only be edited in Oolio One Back Office.
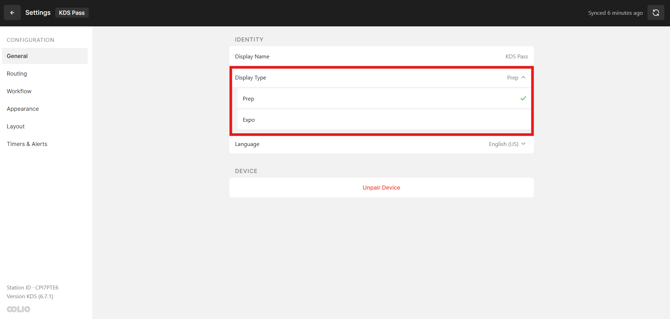
Display Type:
-
Select how orders are displayed and managed on the Kitchen Display Screen:
- Prep: Used for kitchen preparation screens. When a docket is completed and bumped, it is cleared from the other Prep screens displaying that docket.
- Expo: Used for the final service or pass screen. Dockets remain visible on the Expo screen when they are bumped from Prep screens, allowing staff running orders to continue viewing the docket.
-
Select the required Display Type to change the screen between Prep and Expo.
-
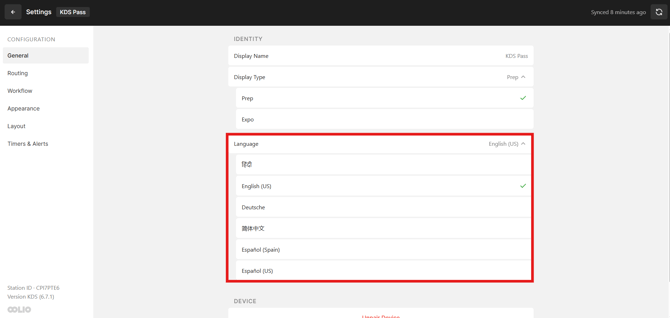
Select Language to change the language displayed on the Kitchen Display Screen.
-
Choose the required language from the available list.
Routing Settings
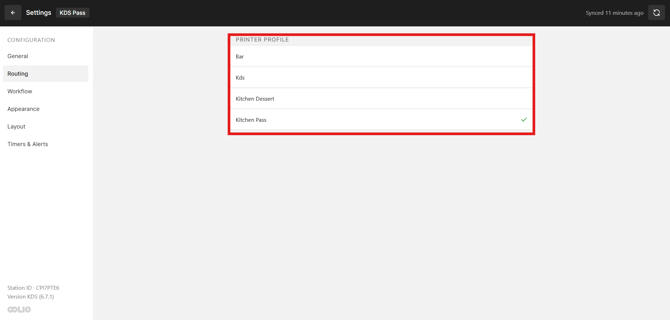
Printer Profile controls which routed products and orders appear on the Kitchen Display Screen.
- Under Printer Profile, review the available profiles.
- Select a Printer Profile to add it to the screen.
- Select an active Printer Profile again to remove it.
A green tick identifies a selected Printer Profile.
Products can be assigned to more than one Printer Profile when they need to route to multiple preparation stations.
Important: At least one Printer Profile must be active on each Kitchen Display Screen.
Workflow Settings
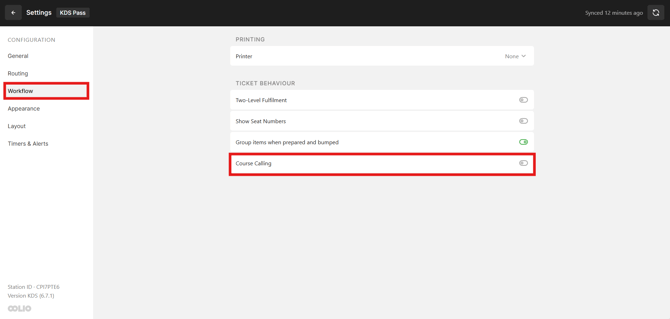
The Workflow settings control how items progress through preparation and how information is displayed during service. Select the fulfilment workflow that matches the kitchen structure.
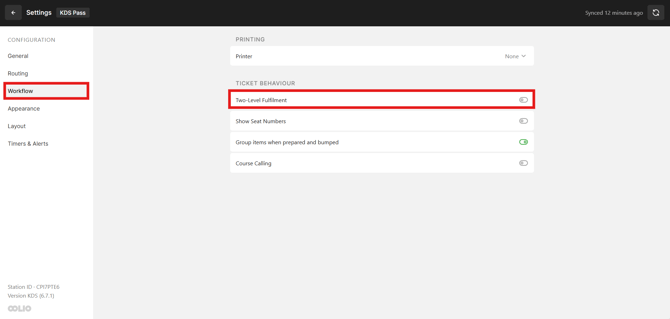
2-Level Fulfilment:
-
2-Level Fulfilment controls how many stages an item can move through before it is considered complete. Enable this setting for kitchens where items pass through multiple preparation stages before they are ready for service.
-
- When disabled:
- Select the product once to tick it.
- Select it a second time to strike it through in green, indicating completion.
- When enabled:
- Select the product once to tick it.
- Select it a second time to strike it through in orange, indicating the first stage of preparation is complete.
- Select it a third time to strike it through in green, indicating the final stage is complete.
- When disabled:
Show or Hide Seat Numbers:
-
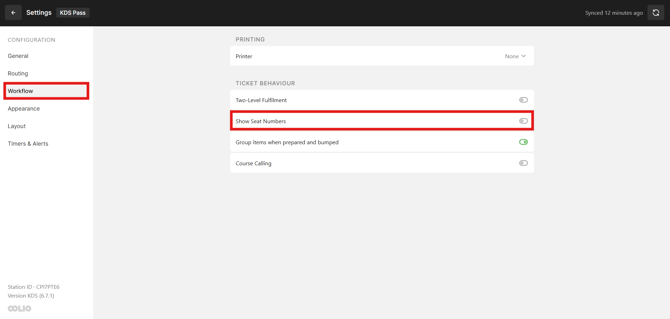
Seat numbers can be displayed when they are useful to the kitchen workflow or hidden when they are not required.
-
Turn Show Seat Numbers on or off as required.
- Enable this setting if the Seat Management is enabled in POS.
Group items when prepared and bumped:
-
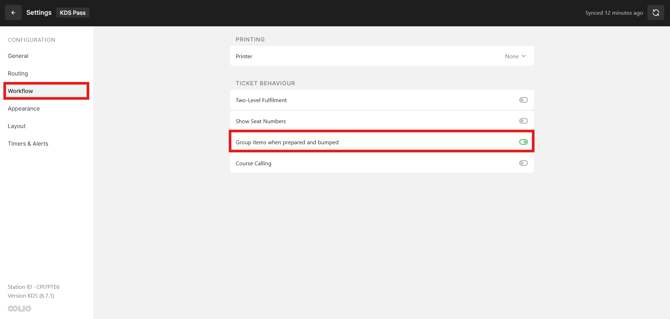
Group Items controls whether prepared or bumped items automatically move to the bottom of the docket.
-
When enabled:
- Completed items are grouped together and moved to the bottom of the docket as they are prepared or bumped.
- Remaining active items are kept together, making outstanding items easier to identify.
-
When disabled:
- Items remain in their original position on the docket after being prepared or bumped.
-
-
Disabling this setting can be useful when the kitchen relies on a fixed item order, such as seat sequencing or course-based arrangements.
Course Calling:
-
Course Calling allows Front of House and kitchen staff to coordinate the preparation of multi-course meals.
-
When an order containing multiple courses is sent:
- Future courses can appear on the KDS in a Hold state.
- The kitchen can see the complete order without preparing later courses immediately.
- When Front of House selects Call Course for the table:
-
The course changes from Hold to Away/Called.
- The course is highlighted on the KDS to indicate that preparation should begin.
-
- This allows the kitchen to distinguish between active, completed, and held courses.
Appearance Settings
Use Appearance settings to control how docket information is displayed.
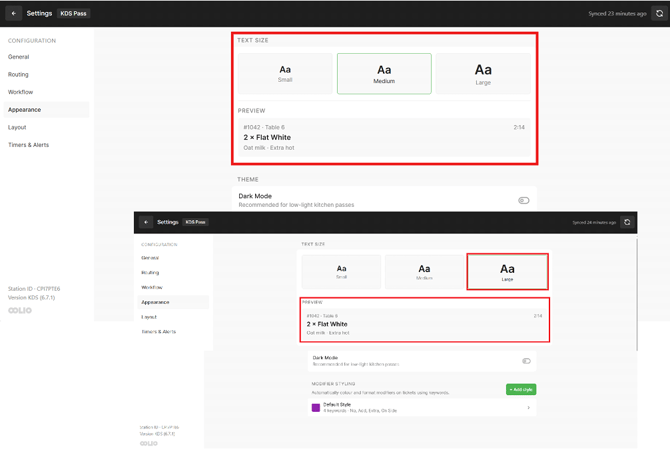
Text Size:
-
Adjust Text Size to make docket information easier to read.
- Under Appearance, select Text Size.
- Choose the required size.
- Review the preview to confirm it is suitable.
- Consider both the screen size and how far staff stand from the display.
Theme:
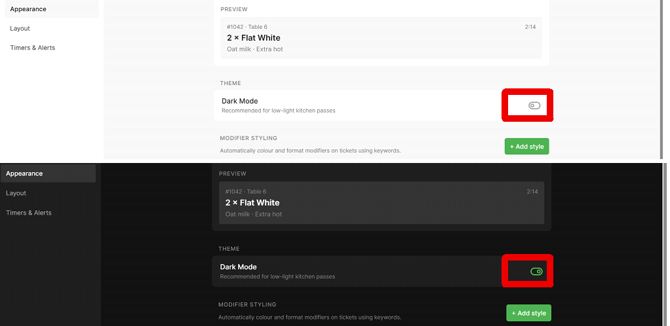
-
Use Dark Mode when a darker, lower-glare display is preferred.
-
Turn Dark Mode on or off as required.
-
The Kitchen Display Screen updates to use the selected theme.
Modifier Styling:
-
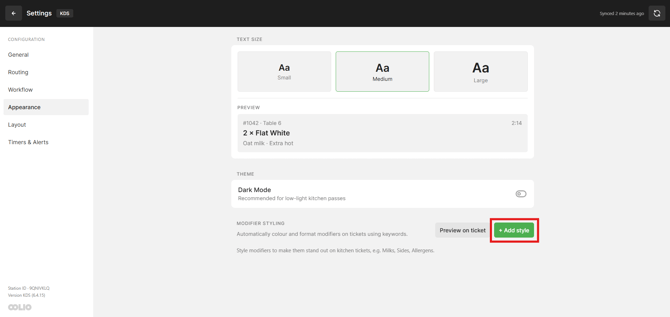
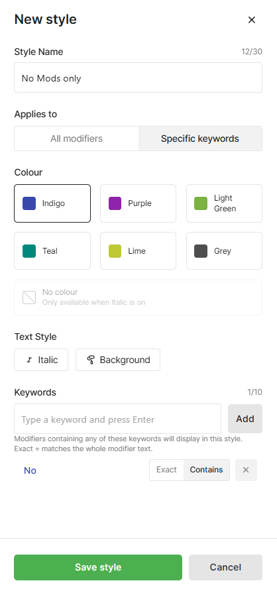
Modifier Styles can make important order changes easier to identify by changing the appearance of modifiers.
-
Styles can be applied to all modifiers or only to modifiers containing configured keywords.
-
For example, separate styles could be created for modifiers containing No, Add, or Extra.
-
Under Appearance, select + Add Style.
-
Fill in the Style Name.
- Applies To: Choose whether the modifier style applies to All Modifiers or only modifiers containing Specific Keywords.
-
Select a colour.
-
Turn Italic and Background on or off as required.
- If Specific Keywords has been selected in step 3, add a Keyword. For each keyword, select:
- Contains: Applies when the modifier includes the keyword.
- Exact: Applies only when the modifier exactly matches the keyword.
- Select Save Style.
-
Layout Settings
The Layout settings determine how open dockets are arranged on the Kitchen Display Screen.
Ticket Layout:
-
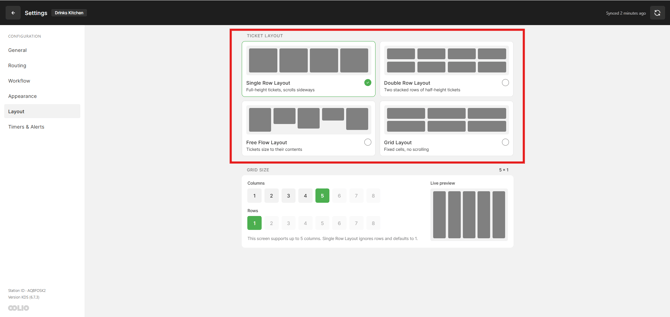
Select the layout that best suits the station:
- Single Row
- Double Row
- Free Flow
- Grid
Grid Size:
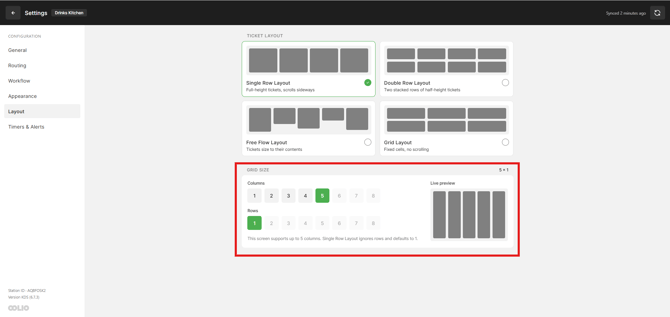
- When using Grid, select the number of Rows and Columns required for the screen
-
Grid arranges dockets into defined positions on the screen.
-
In Grid view:
- Dockets fill available positions from left to right and top to bottom.
- When a docket is bumped, queued dockets move into the available position.
- Longer dockets can continue into additional grid positions.
- When the grid is full, additional dockets move to the next page or waiting queue.
- Timers, sorting, bumping, re-bumping, item served, and recall actions remain available.
- Docket information is retained after a refresh or restart.
Timers & Alerts Settings
Use Timers & Alerts to highlight orders that have been waiting for a configured period, play an audible notification for new tickets, and configure customer SMS updates.
Create a Timer:
-
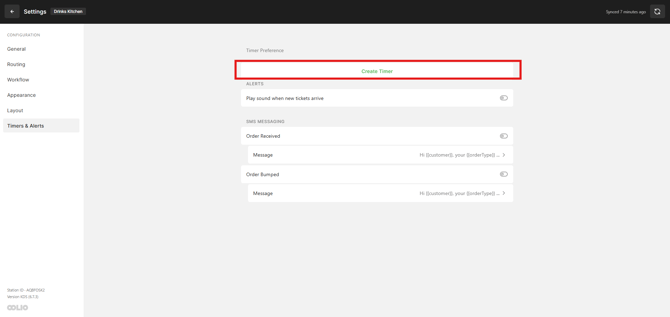
Timers change the appearance of a docket after a configured amount of time.
- Under Timers & Alerts, select Create Timer.
- Enter a Name, such as 10 Minutes.
- Set the time delay before the timer activates.
- Select the colour to apply when the timer is reached.
- Select Confirm.
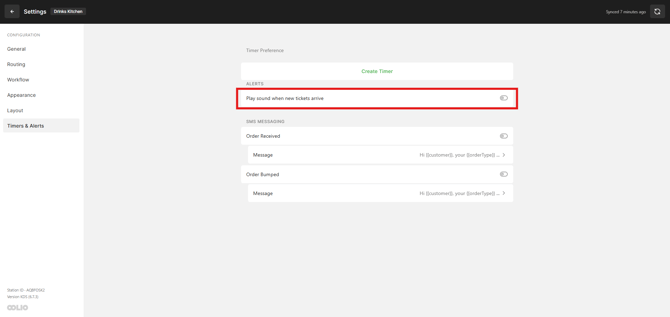
Audible Alert:
-
Turn Audible Alert on to play a sound when a new ticket is received.
-
Turn it off where an audible notification is not required.
Configure SMS Messaging:
-
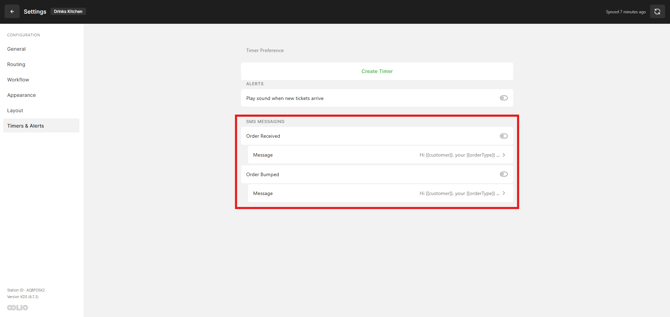
Kitchen Display Screens can send customer SMS notifications as an order progresses.
-
Messages can be configured for supported order events, including when an order is received or bumped.
- Open Timers & Alerts.
- Enable the required Message Type.
- Open Message.
- Edit the default message as required.
- Add supported variables where required.
- Save the message.
-
To return the message to its original wording, select Set Default.
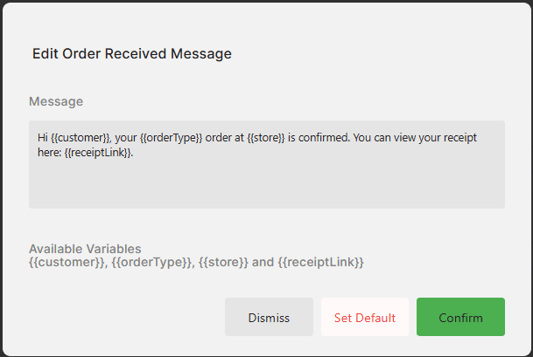
Important: Do not alter the text inside configured variables, such as . These variables link to information from the order and must remain exactly as configured for the data to display correctly.
Troubleshooting
Orders are difficult to read:
-
Open Settings > Appearance and
-
Adjust Text Size for the screen size and viewing distance.
-
Enable Dark Mode where a darker display is easier to view.
-
Modifiers are not using the expected style:
-
Open Settings > Appearance and check:
-
The required Modifier Style is configured.
-
The correct keywords have been added.
-
Contains or Exact is configured appropriately for the modifier wording.
-
Orders are not appearing on the Kitchen Display Screen:
-
Open Settings > Routing and confirm the appropriate Printer Profile is selected.
-
At least one Printer Profile must be active.
The docket arrangement does not suit the station:
-
Open Settings > Layout and:
-
Review the selected Ticket Layout.
-
Adjust Grid Size if Grid is being used.
-
Frequently asked questions
Can different Kitchen Display Screens use different settings?
-
Yes. Kitchen Display settings can be configured to suit the workflow of each kitchen or service station.
-
Available controls may vary depending on the KDS version and device.
Can the Printer Profiles on a Kitchen Display Screen be changed?
-
Yes. Under Routing, select or clear the Printer Profiles required for the screen.
-
A green tick identifies an active Printer Profile.
Can seat numbers be hidden?
-
Yes. Under Workflow, turn Show Seat Numbers off if seat numbers are not required.
Can modifiers be highlighted automatically?
-
Yes. Modifier Styles can use colours, text formatting, and keywords to make particular modifiers easier to identify.
-
For example, styles could be created for modifiers containing words such as No, Add, or Extra.