Kitchen Display Screens (KDS) in Oolio One replace traditional paper dockets with digital order dockets sent from Oolio One POS and online ordering channels. Kitchen and bar teams can use KDS to track preparation, organise orders by station or course, prioritise orders and complete individual items or entire dockets.
Order performance can also be monitored through Oolio One Insights.
Before starting
Before configuring the KDS:
- Identify the kitchen or bar stations that require a KDS.
- Have each KDS installed and connected at the location.
- Configure the Printer Profiles used to route products to each station. See 🔗 Configure Printer Profiles for setup instructions.
- Have access to a mobile device with a camera to complete the initial QR code authentication.
Step 1: Enable Kitchen Display
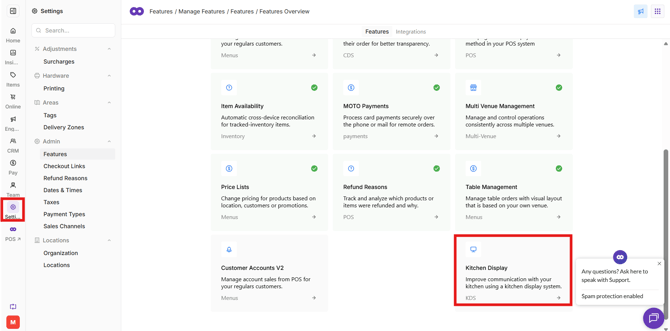
Enable the Kitchen Display feature before creating and connecting displays.
- In Oolio One Back Office, open Settings > Features > Kitchen Display.
- Select Enable.
KDS can now be configured for the organisation.
Step 2: Create a Kitchen Display Screen
Create a display for each kitchen or bar station that will use KDS.
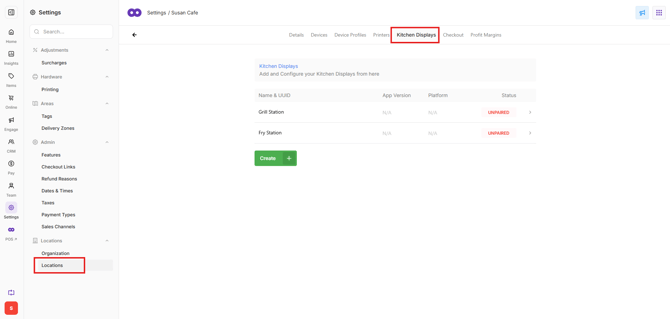
- Open Settings > Locations.
- Select the location where the KDS will be used.
- Open Kitchen Displays.
- Select Create.
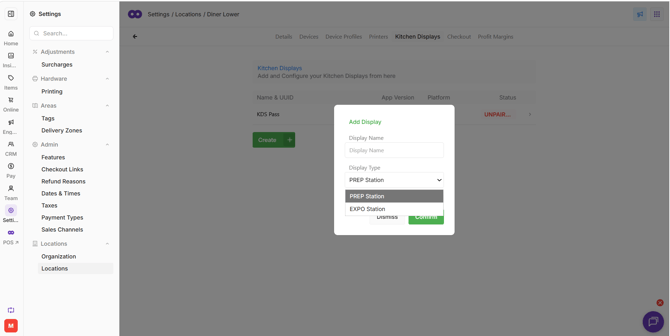
- Enter a Display Name that clearly identifies the display or station, such as Kitchen Pass or Bar.
- Select the required Display Type:
- Prep: Used for kitchen preparation screens. When a docket is completed and bumped, it is cleared from the other Prep screens displaying that docket.
- Expo: Used for the final service or pass screen. Dockets remain visible on the Expo screen when they are bumped from Prep screens, allowing staff running orders to continue viewing the docket.
- Select Save.
Repeat these steps for each KDS required at the location.
Step 3: Open Oolio KDS
Open KDS directly on the device that will be used as the Kitchen Display Screen.
Use either:
- The Oolio KDS app, available from the Google Play Store or Apple App Store.
- A supported web browser by opening kds.oolio.io.
- A QR code is displayed when KDS is opened and ready to be paired.
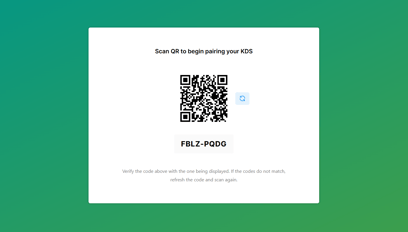
Note: The app or browser must be located on the KDS device to enable successful pairing.
Step 4: Authenticate the KDS
Use a mobile device with a camera to authenticate the KDS.
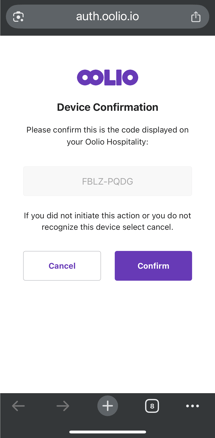
- Scan the QR code displayed on the KDS using the mobile device.
- Open the auth.oolio.io link when prompted.
- Compare the eight-digit code displayed on the mobile device with the code shown on the KDS.
- If the codes match, confirm the connection.
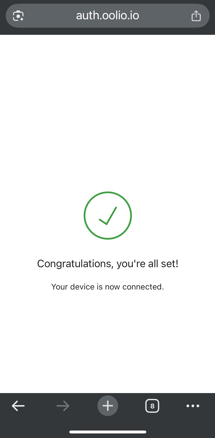
- Wait for the confirmation message to appear on the mobile device.
- Return to the KDS.
The KDS is now authenticated and ready to be connected to its location and configuration.
Step 5: Select the KDS configuration
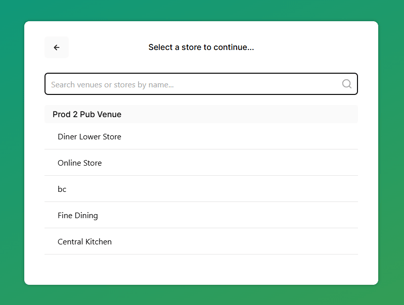
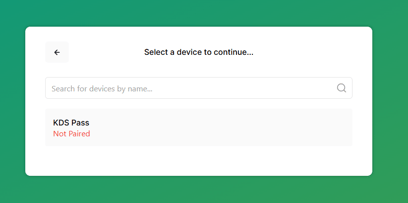
After authentication, return to the KDS and select the location, KDS and Printer Profiles that the display should use.
- For a multi-location organisation, select the required Location.
- Select the KDS Device created in Back Office.
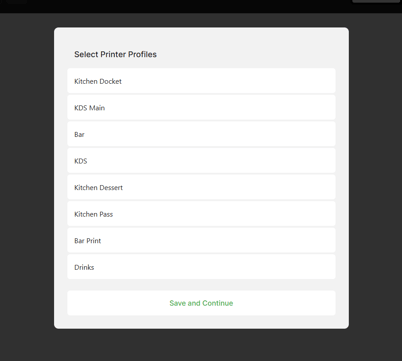
- Select the required Printer Profile(s).
Printer Profiles determine which routed products and orders appear on the KDS. Select the profiles that correspond with the station using the display.
For example, a bar KDS could use the Printer Profile that routes beverage items, while a kitchen KDS could use the profiles responsible for food preparation.
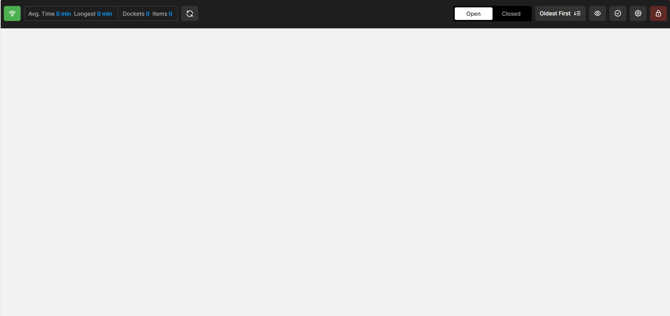
The KDS is now connected and ready to receive orders.