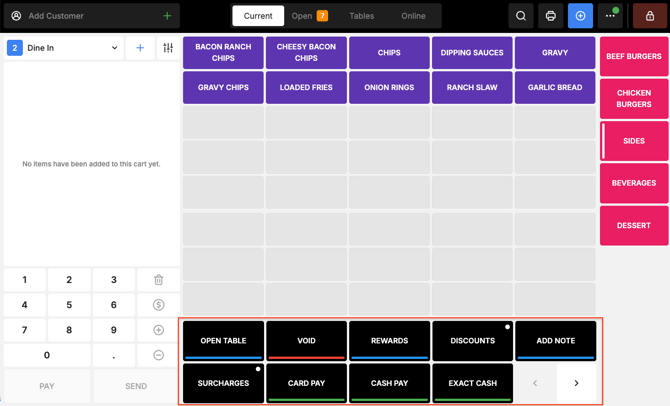
Use Function Maps to control which function actions appear on the POS and the order in which they are displayed. Create different Function Maps for different workflows or Device Profiles so commonly used actions are easy to access and unnecessary actions can be hidden.
Function Maps contain two types of actions:
- Group Action: A top-level tile containing multiple Sub-Actions.
- Sub-Action: An individual function that can appear within a Group Action or directly on the top level of the Function Map.
Before starting
Before customising a Function Map:
- Identify the functions staff need during service.
- Confirm which functions can be safely hidden.
- Confirm which locations or POS devices require the customised Function Map.
- Make sure the required Device Profile is available if the Function Map will be assigned to a specific POS configuration.
Important: Take particular care when hiding payment, printing, cash or item availability functions. Hiding a required function can interrupt service.
Step 1: Open Function Maps
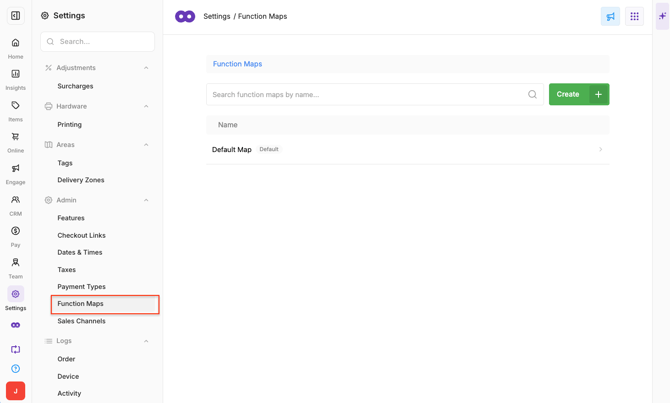
- Go to Back Office > Settings > Function Maps.
- Review the available Function Maps.
The Default Map appears first and is identified as the default. Use the search field to find a specific Function Map when multiple maps are available.
The Default Map cannot be renamed or deleted.
Step 2: Create a Function Map
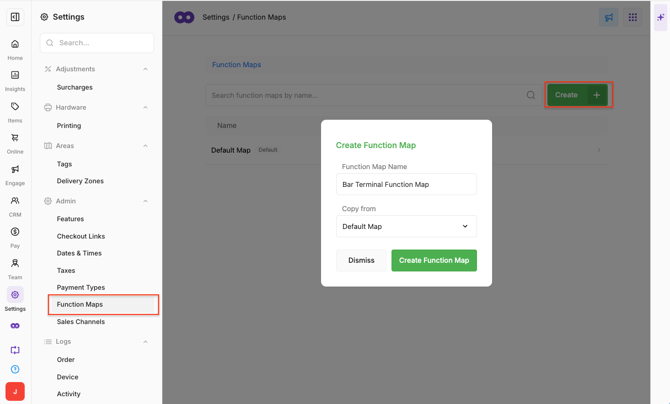
Create a new Function Map by copying an existing map.
- Select Create.
- Enter a unique name for the Function Map.
- Select the Function Map to copy.
- Confirm the creation.
- Open the new Function Map to begin customising it.
The Default Map is selected as the source by default, but any existing Function Map can be copied.
Note: A copied Function Map is independent of its source. Changes made to either map do not affect the other, and deleting the source does not delete its copies.
Step 3: Reorder functions
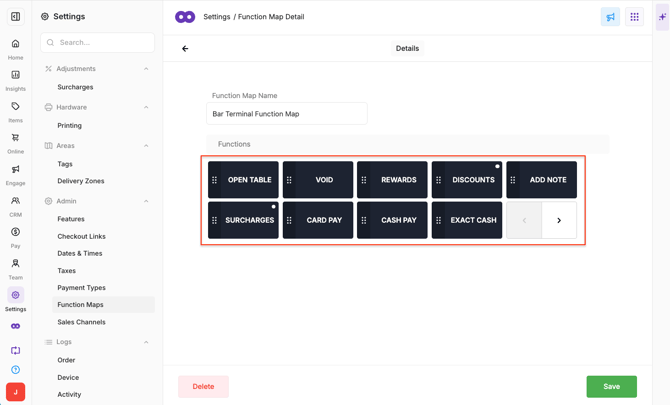
Arrange functions so commonly used actions are easy to find.
- Open the required Function Map.
- Find the action to move. Use the navigation arrow to view additional actions if required.
- Drag the action to its new position.
- Continue rearranging actions until they appear in the required order.
- Select Save.
Sub-Actions can be placed at either level of the Function Map. Group Actions can only appear at the top level and cannot be placed inside another Group Action.
Step 4: Hide functions
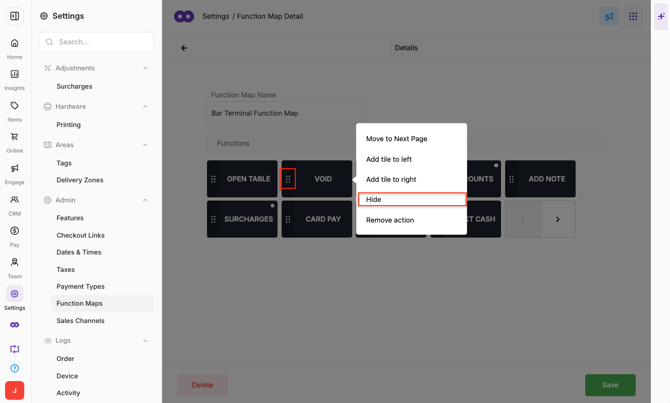
Hide functions that are not required on the POS.
- Open the required Function Map.
- Select the action to hide.
- Select Hide.
- Select Save when the configuration is complete.
Important: Hidden actions do not appear in the POS function grid. If a Group Action is hidden, its Sub-Actions cannot be accessed through that group.
Step 5: Add a Sub-Action to the top level
Sub-Actions that normally appear within a Group Action can also be added directly to the top level of the Function Map.
For example, End Shift appears within Manager Functions by default but can be added as its own top-level tile for direct access.
To add a Sub-Action:
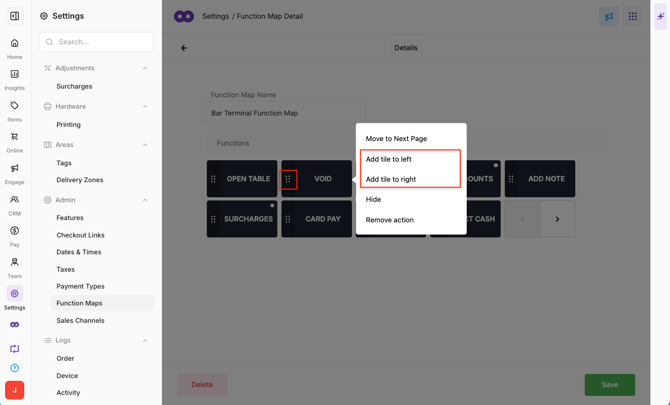
- To replace an existing action, select its tile and select Hide.
Alternatively, to add another tile:
- Select an existing tile.
- Select:
- Add tile to the right, or
- Add tile to the left.
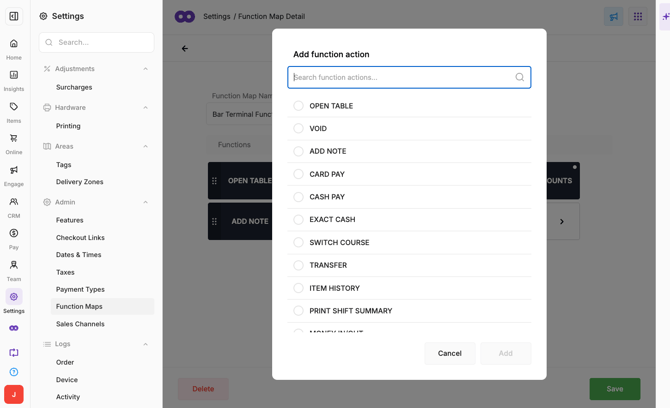
- Select the empty tile.
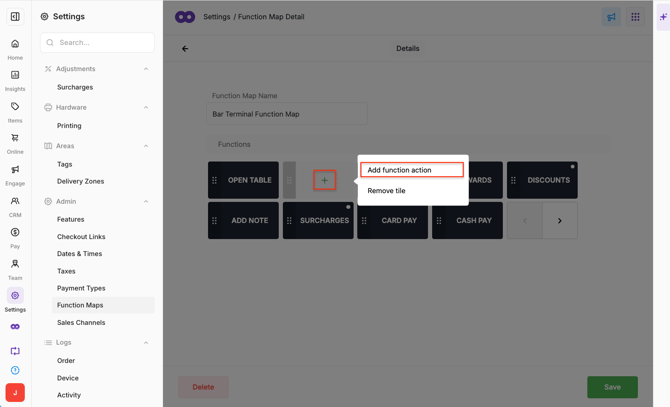
- Select Add function action.
- Find and select the required Sub-Action.
- Select Add.
- Select Save.
 Step 6: Customise a Group Action
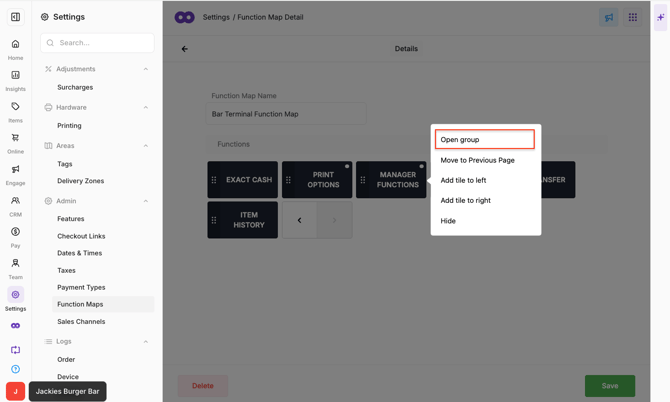
Sub-Actions within a Group Action can be arranged independently.
- Select the required Group Action.
- Select Open Group.
- Drag the Sub-Actions into the required order.
- Select Save.
A Group Action cannot be added within another Group Action.
Step 7: Restore a hidden action
A hidden action can be added back to the Function Map at any time.
- Select an empty tile.
- Select Add function action.
- Find and select the required action.
- Select Add.
- Select Save.
Step 8: Assign the Function Map
Assign the Function Map to the required Device Profile.
See 🔗 Configure Device Profiles for instructions on assigning settings to a POS configuration.
After assigning the Function Map, check the configuration on the POS:
- Synchronise or reload the POS if required.
- Confirm the expected actions are displayed.
- Check that actions appear in the intended order.
- Open any customised Group Actions and check their Sub-Actions.
- Test critical functions such as payments, printing, cash controls and item availability.