
Bistro Mode in Oolio One POS allows customers in the same group to order and pay separately while having their items sent for preparation together. It uses Hold Print to prevent kitchen and bar dockets from printing until everyone in the group has finished ordering.
For example, customers dining at the same table can each place and pay for their own order, then release the held printing so the group’s items are sent to the kitchen and bar together.
Step 1: Hold printing
Enable Hold Print before sending or completing the first order.
- From the POS Function Map, select Print Options.
- Select Hold Print.
Print on Hold appears above the cart. The number displayed in brackets indicates the number of products currently being held from printing.
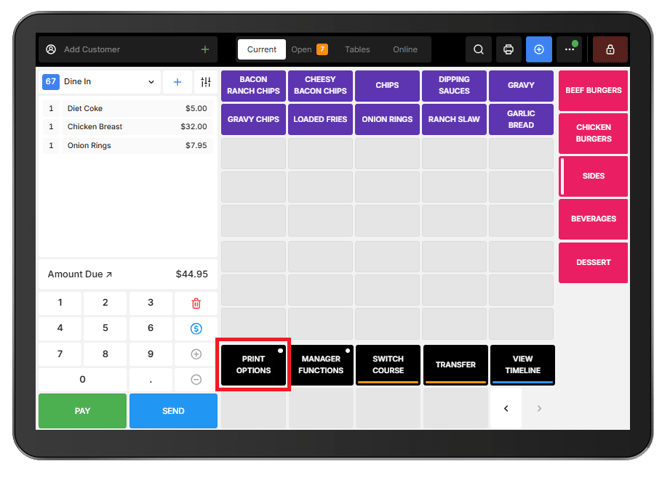
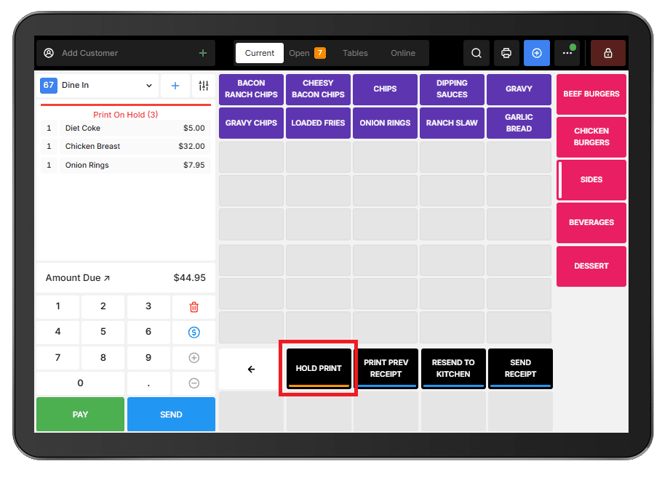
Important: Select Hold Print before selecting Pay Now or Send. Once an order has been processed without Hold Print enabled, additional orders cannot be added to the same held docket.
Step 2: Take the first order
- Add the first customer's products to the cart.
- Select Pay Now.
- Process the customer's payment using the required payment method.
- Select Add to Order to continue adding orders without printing the held dockets.
- Repeat these steps for each additional customer.
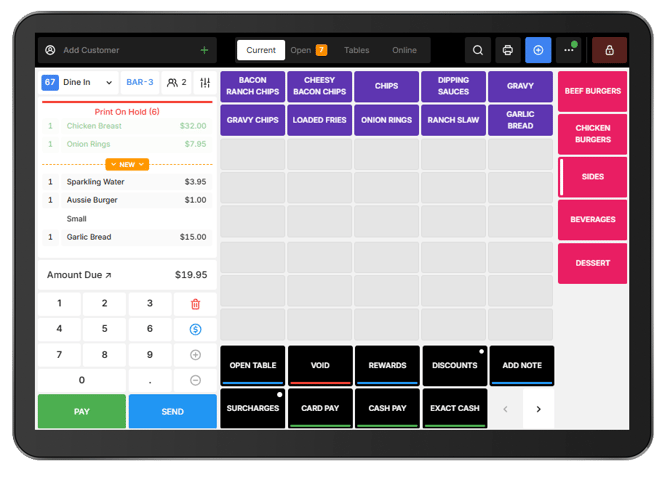
Previously paid items display in green, while newly added unpaid items display in grey. The cart also displays the amount already paid and the amount currently due.
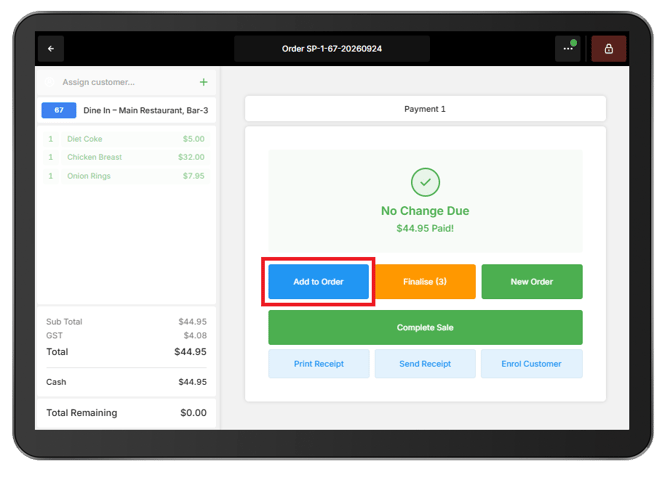
Step 4: Finalise the group order
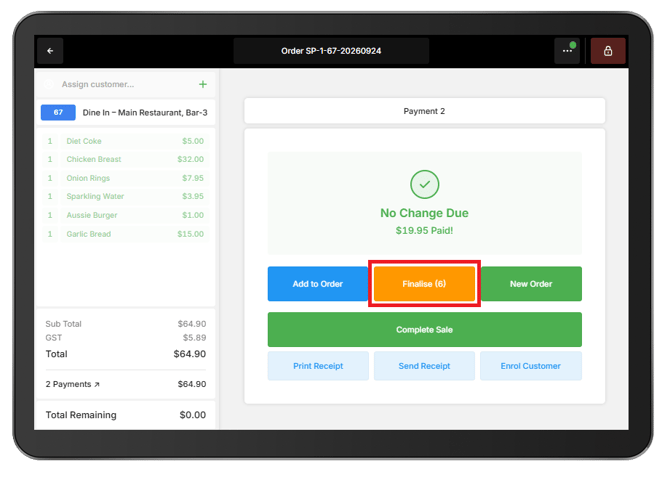
Once everyone in the group has ordered and paid, select Finalise.
The held items are released for printing. Dockets print at their configured preparation locations, such as the kitchen or bar, with the items from the separate orders included together.
Understand the options after payment
Several options may be available after completing a payment:
- Finalise: Closes the order and releases the held dockets for printing.
- Add to Order: Keeps the order open so additional customers can order and pay while printing remains on hold.
- New Order: Closes the order, releases the dockets for printing, and returns to the Order screen.
- Complete Sale: Closes the order, releases the dockets for printing, and returns to the configured default screen.
When taking separate orders for the same group, use Add to Order until everyone has ordered. Select Finalise when the complete group order is ready to be sent for preparation.
Hold the order while waiting for another customer
If some customers have ordered and paid but another customer is not ready to order, the order can remain on hold while other orders are taken.
Do not select Finalise, as this closes the order and releases the dockets for printing.
Instead:
- Select Send.
- Continue taking other orders as required.
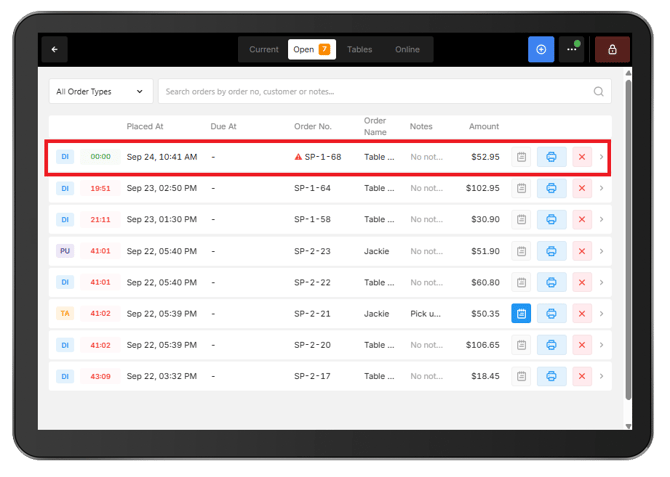
- When the remaining customer is ready, reopen the held order from Open Orders.
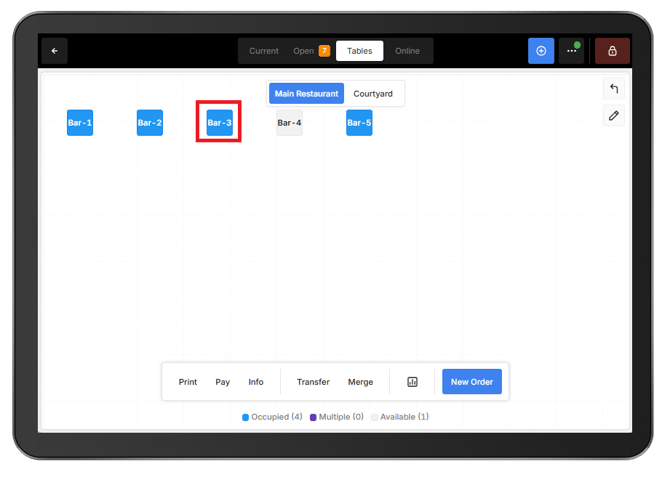
If the order is assigned to a table, it can also be reopened by selecting the table from the Floor Plan.
- Add the remaining items.
- Take payment as required.
- Select Finalise when the entire group has ordered.
The held dockets are then released for printing.
Reprint a receipt
Receipts can be reprinted after the order has been finalised.
- Open the POS Navigation Menu (⋯).
- Select Order History.
- Find and select the required order.
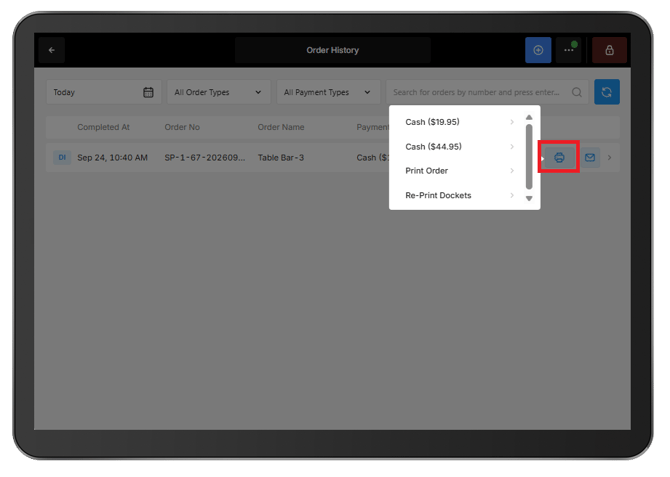
- Select the Print icon.
- Choose the required print option.
A specific payment can also be selected to produce a receipt with that payment type shown in bold.
Send a receipt digitally
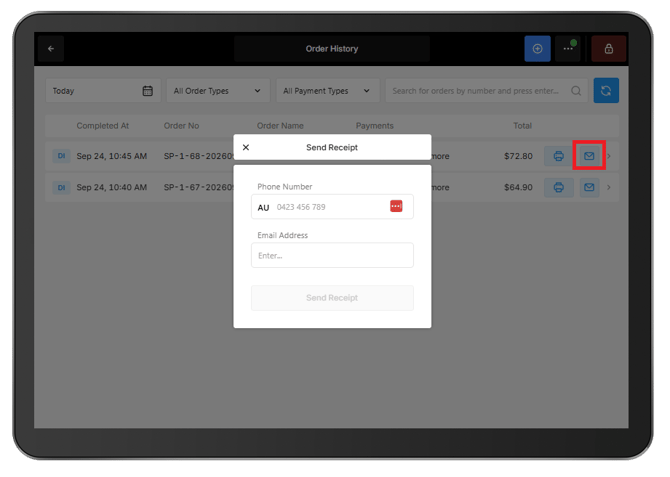
From the completed order in Order History, select the Envelope icon to send the receipt using the customer's phone number or email address.
Note: A separate customised bill cannot currently be printed for each individual order within the group. Receipts include the orders and transactions associated with the completed group order.