How Surcharges Work in Oolio POS
Surcharges can be created in Oolio Back Office and used within the Front of House POS.
Once created, surcharges appear as buttons in the Function Map under Surcharges. These can be set as either a dollar amount or a percentage, and permissions can be applied to control which staff members can use them.
Surcharges can also be scheduled to apply automatically based on specific dates, days, or times.
Step One: Open Location Settings
To create a surcharge, first navigate to your location settings.
- From Back Office, select 'Settings'.
- Select 'Locations'.
- If you have multiple venues, they will be listed here.
- Select the settings cog next to the location you want to update.

Step Two: Create a New Surcharge
From store Settings, you can access and create surcharges for your location.
- Select the 'Surcharges' tab from the top menu.
- This will display all existing surcharges for the selected location.
- Select 'Create+'.
- This will open the surcharge details page.
- Enter the name of the surcharge as it should appear on receipts.
- Enter the amount to be charged.
- Use the dropdown to select dollar ($) or percentage (%).
- Select the relevant stores.
- Select the relevant order types (e.g. Dine-In, Delivery).
- Select 'Save' to create the surcharge.
For example, this could be used to create a public holiday surcharge. 
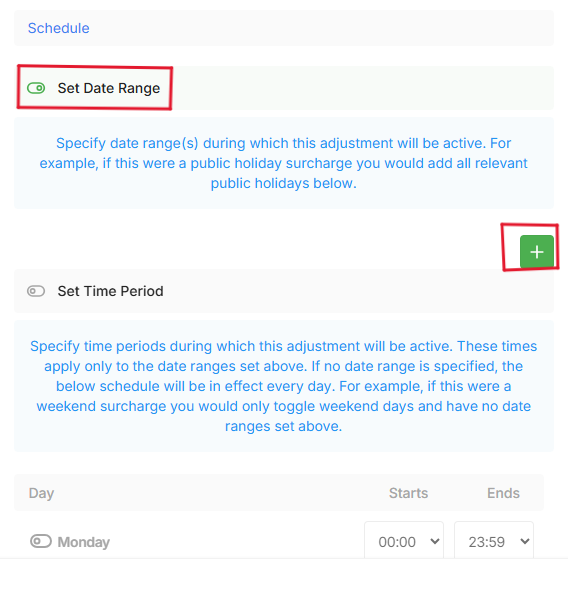
Step Four: Set Scheduling Options
Surcharges can be scheduled to apply automatically for specific dates or times.
- In the surcharge details page, scroll to 'Schedule'.
- Toggle set date range to on.
- Select the '+' icon to add dates.
- Enter the dates the surcharge should apply to (e.g. Public Holidays).
To apply the surcharge during specific times or recurring days:
- Toggle set time period to on.
- Enter the required day or time rules (e.g. Sundays or specific hours).
- Toggle 'Automatic' to ensure the surcharge applies without manual selection.
Once complete, select 'Save'.
To apply changes to POS, ensure you Sync Data.
Step Five: Configure Additional Settings (Optional)
Additional surcharge behaviour can be customised.
- Scroll to 'Advanced Options'.
- Toggle 'allow on payment type' to restrict surcharges to specific payment methods.
- Toggle 'Do not include Sales Amount' if the surcharge should not be included in product sales totals.
- Use 'Advanced Rules' to apply surcharges based on guest count.
Select save after making any changes.
