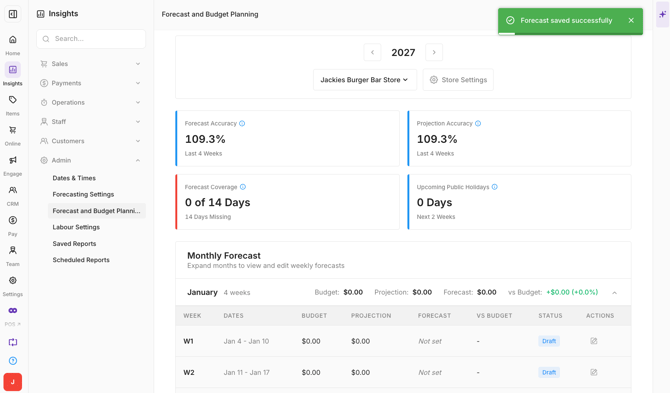
Set revenue Budgets and Forecasts in Oolio One Insights to establish revenue targets and track expected trading performance.
A Budget sets the revenue target for a period, while a Forecast records the revenue expected for individual trading days. Forecasts can be adjusted using available historical and weather information as trading conditions change.
Step 1: Configure Forecasting Settings
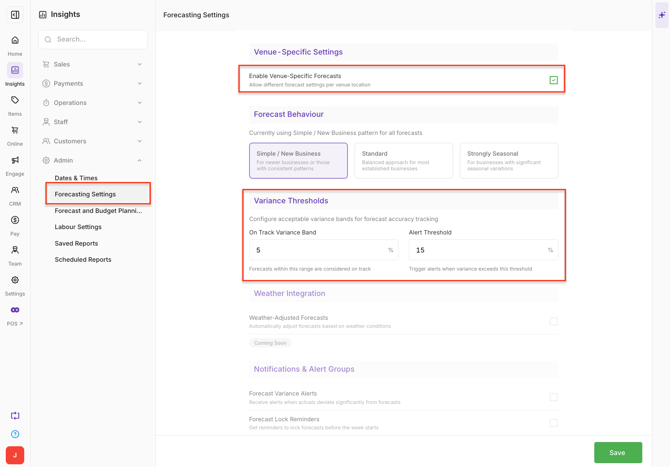
Open Back Office > Insights > Admin > Forecasting Settings.
-
Configure:
- Multi Location: Enable when forecasting needs to be reported across multiple Locations.
- On Track Variance Band: Enter the percentage variance within which revenue is considered on track.
- Alert Threshold: Enter the percentage variance used to trigger a trading alert.
-
Select Save.
-
Create a Budget:
-
A Budget sets the revenue target for a selected period. Budgets can be created as a single total or divided across Reporting Groups.
-
Step 2: Open Forecast and Budget Planning
Open Back Office > Insights > Admin > Forecast and Budget Planning.
-
Select the required Year and Location.
[Screenshot Placeholder: Forecast and Budget Planning showing the Year and Location selectors.]
Step 3: Create the Budget
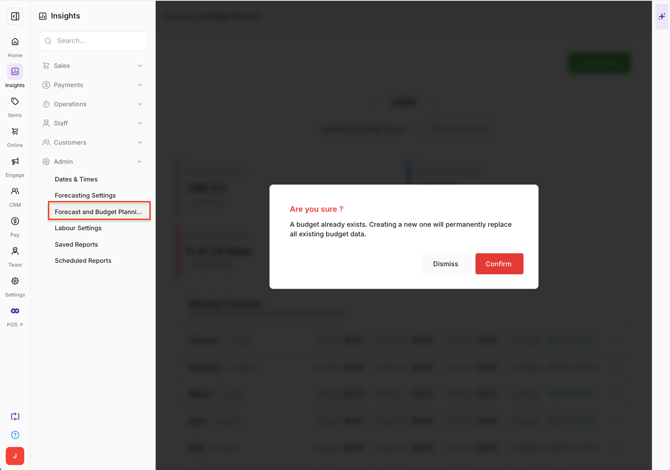
Select Create Budget.
-
If a Budget already exists for the Location, a warning displays:
-
A budget already exists. Creating a new one will permanently replace all existing budget data.
-
Select Confirm only when the existing Budget should be replaced, or Dismiss to keep the existing Budget.
Important: Creating another Budget for the Location permanently replaces its existing Budget data.
Step 4: Select the Budget duration and scope
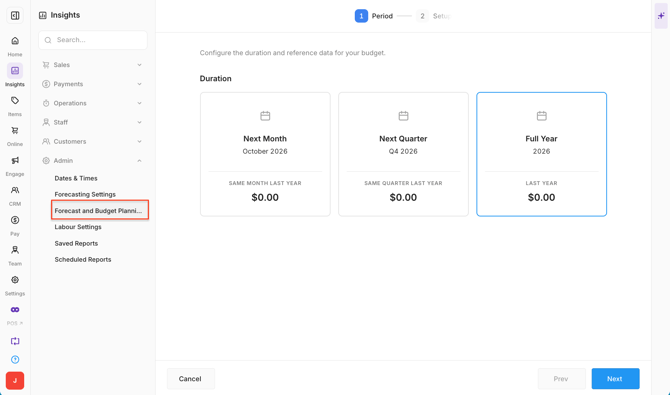
Select the period:
-
The Budget should cover:
- Next Month: The upcoming calendar month.
- Next Quarter: The next three-month period.
- Full Year: January to December.
-
Where historical data is available, information from the corresponding period in the previous year is displayed for reference.
-
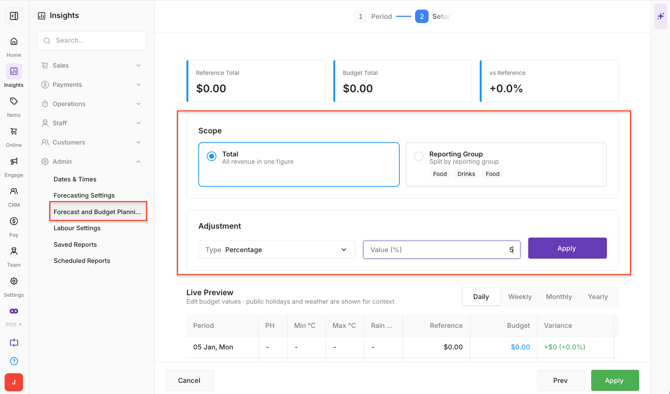
Select the Budget scope:
- Total: Creates one combined revenue target.
- Reporting Group: Splits the Budget across configured Reporting Groups.
-
Use Adjustment to apply a percentage or dollar adjustment across all dates, then select Apply.
Step 5: Enter Budget values
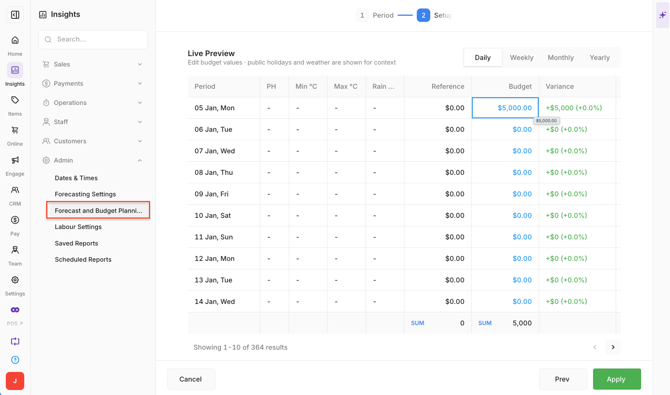
Enter the required daily revenue targets in the Budget column.
-
The Budget screen also displays:
- Reference: Revenue from the corresponding date in the previous year.
- Weather: Available minimum temperature, maximum temperature and precipitation information.
- Variance: Difference between the previous year's revenue and the new Budget.
-
When budgeting by Reporting Group, allocate the Budget using Contribution %.
-
The combined Contribution % for the Reporting Groups must equal 100% for the period.
-
Use Adjustment where required to apply a percentage or dollar change across all dates.
 Step 6: Confirm the Budget
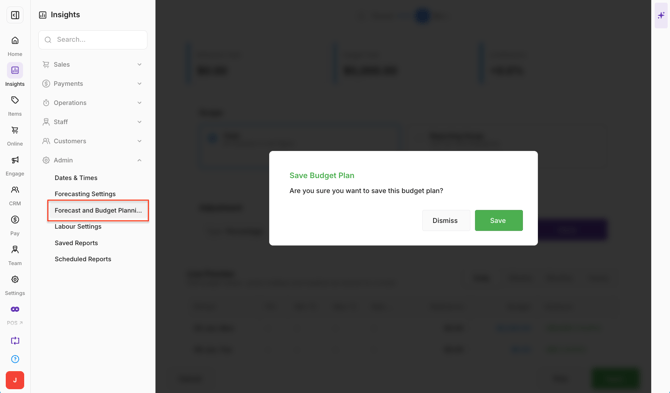
Review the Budget, then select Confirm.
-
A secondary confirmation is displayed before the Budget is saved.
-
Select Back instead if further changes are required.
Enter a Forecast:
-
A Forecast records the revenue expected for each trading day and is separate from the Budget.
-
For example, a Monday may have a Budget of $5,000, but available information indicates expected revenue of $5,500. The Forecast for that Monday can be set to $5,500 while the Budget remains $5,000.
Step 7: Select the Forecast period
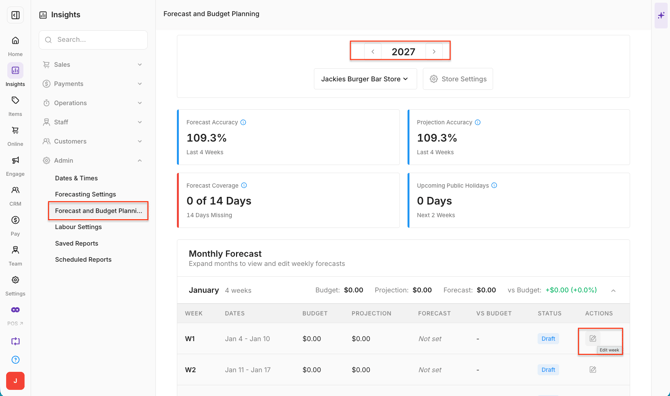
Open Back Office > Insights > Admin > Forecast and Budget Planning.
-
Select the required Month and Week, then select the Edit pencil icon beside the week.
Step 8: Enter daily Forecasts
-
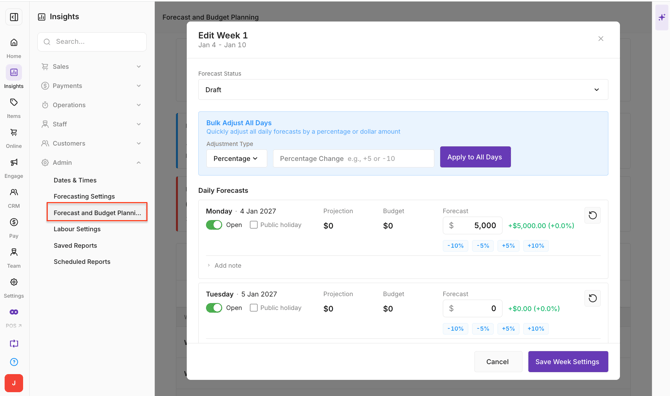
For each day:
- Set the day as Open or Closed.
- Mark the day as a Public Holiday where applicable.
- Enter or edit the Forecast value.
- Use +5%, -5%, +10% or -10% to quickly adjust the Forecast.
- Add a Note where useful to record information that may affect expected trading.
-
For example, a Note could record a large function or booking expected on that day.
-
Use Bulk Adjust to apply a percentage or dollar adjustment across all days.
Step 9: Save and lock the Forecast
Check Forecast Status before saving:
- Draft: Use while the Forecast is still being prepared or adjusted.
- Locked: Use when the Forecast for the week has been finalised.
Add any required Week Notes, then select Save Week Settings.
Important: Only users with elevated permissions can unlock a Forecast after it has been locked.