
Time and Attendance in Oolio One Back Office allows managers to view and manage staff timesheets, record missing attendance, correct clock-in and clock-out times, and export timesheets for reporting.
The feature can be enabled and access managed through user permissions in Back Office.
Getting Started
Time and Attendance permissions are included in the standard Manager, Location Owner and Owner roles.
For custom roles, permissions can be configured under Team > User Roles:
- Update Worklogs: View timesheets and clock out staff in POS.
- View Timesheets: View, filter and export timesheets in Back Office.
- Manage Timesheets: Record, edit and delete timesheets in Back Office.
Step 1: Enable Time and Attendance
Time and Attendance must be enabled before staff can clock in and out using Oolio One POS. The feature is enabled for the entire organisation.
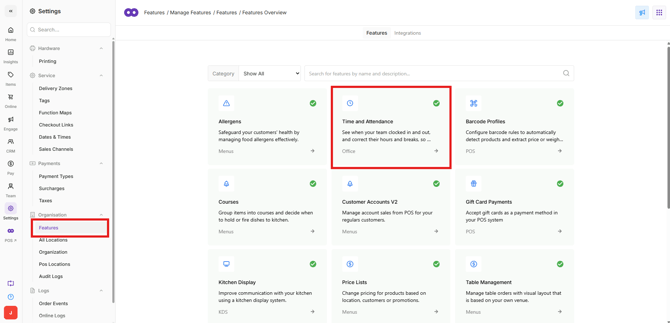
- In Oolio One Back Office, go to Settings > Features.
- Find Time and Attendance.
- Enable the feature using the toggle.
- Sync Oolio One POS to apply the changes.
Once enabled, the Clock In tab becomes available on the POS lock screen, and the Timesheets screen becomes available in Back Office.
Step 2: View Staff Timesheets
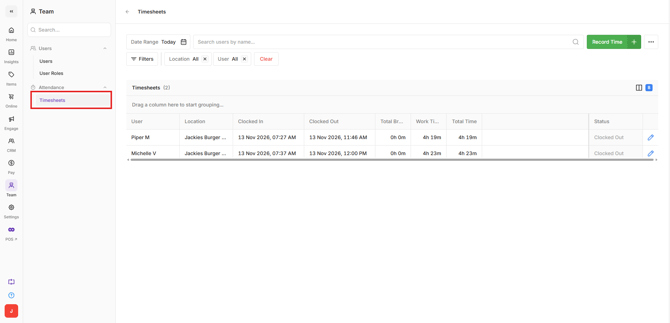
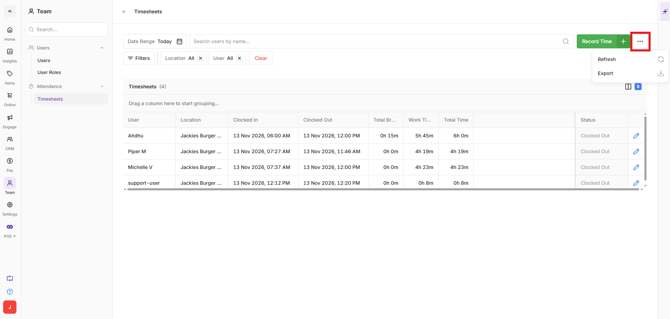
The Timesheets screen displays staff attendance records, including clock-in and clock-out times, breaks and total hours worked.
- In Oolio One Back Office, go to Team > Attendance > Timesheets.
- Select the required date range, up to 31 days.
- Use the Location, User and Status filters, or search by staff name to find specific timesheets.
Timesheets can have the following statuses:
- Clocked-in: The staff member has clocked in and has not yet clocked out.
- On Break: The staff member is currently on a recorded break.
- Clocked-out: The staff member has completed their shift and clocked out.
Step 3: Record a Missing Timesheet
Timesheets can be added manually when a staff member has forgotten to clock in or their attendance was not recorded.
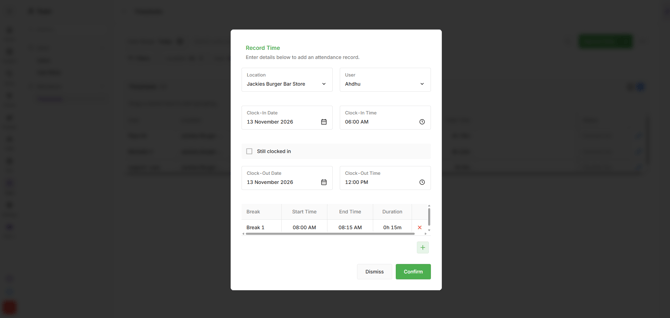
- From Team > Attendance > Timesheets, select Record Time.
- Select the required staff member and location.
- Enter the clock-in and clock-out dates and times.
- Add any breaks taken during the shift.
- Select Confirm to save the timesheet.
Step 4: Edit or Delete a Timesheet
Existing timesheets can be corrected if clock-in, clock-out or break times were recorded incorrectly.
Edit a Timesheet
- Find the required timesheet and select the pencil icon.
- Update the clock-in, clock-out or break times as required.
- Select Confirm to save the changes.
For an open timesheet, the Still clocked in option can be used to keep the timesheet open.
Delete a Timesheet
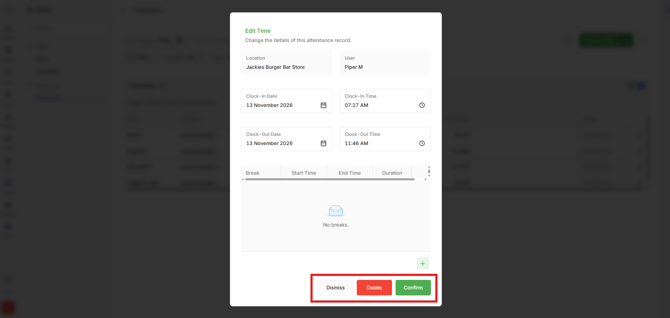
- Find the required timesheet and select the pencil icon.
- Select Delete.
- Confirm the deletion.
Important: Deleted timesheets are permanently removed and cannot be recovered.
Step 5: Export Timesheets
Timesheets can be exported from Back Office for payroll or reporting purposes.
- In Oolio One Back Office, go to Team > Attendance > Timesheets.
- Select the required date range and apply any relevant filters.
- Select the Export option to download the displayed timesheets as a CSV file.
For instructions on clocking in, recording breaks and managing attendance in POS, see 🔗 Clock in & Manage Timesheets in POS