Product Groups, Categories and Reporting Groups organise products in Oolio One and determine how they are structured, displayed and reported. All three are required when creating a product, so setting them up in Back Office first makes the required selections available during product creation.
Each serves a different purpose:
- Product Groups define the top-level structure that products sit within.
- Categories group similar products for Menu Management and Insights reporting.
- Reporting Groups group products at a higher level for reporting, allowing sales from multiple Categories to be reported together.
For example, Categories such as White Wine, Red Wine, Sparkling, Beer and Soft Drinks could use Beverages as their Reporting Group.
Before starting
Plan the required Product Groups, Categories and Reporting Groups before creating them. Using a clear and consistent structure makes products easier to organise and reporting easier to manage as the product list grows.
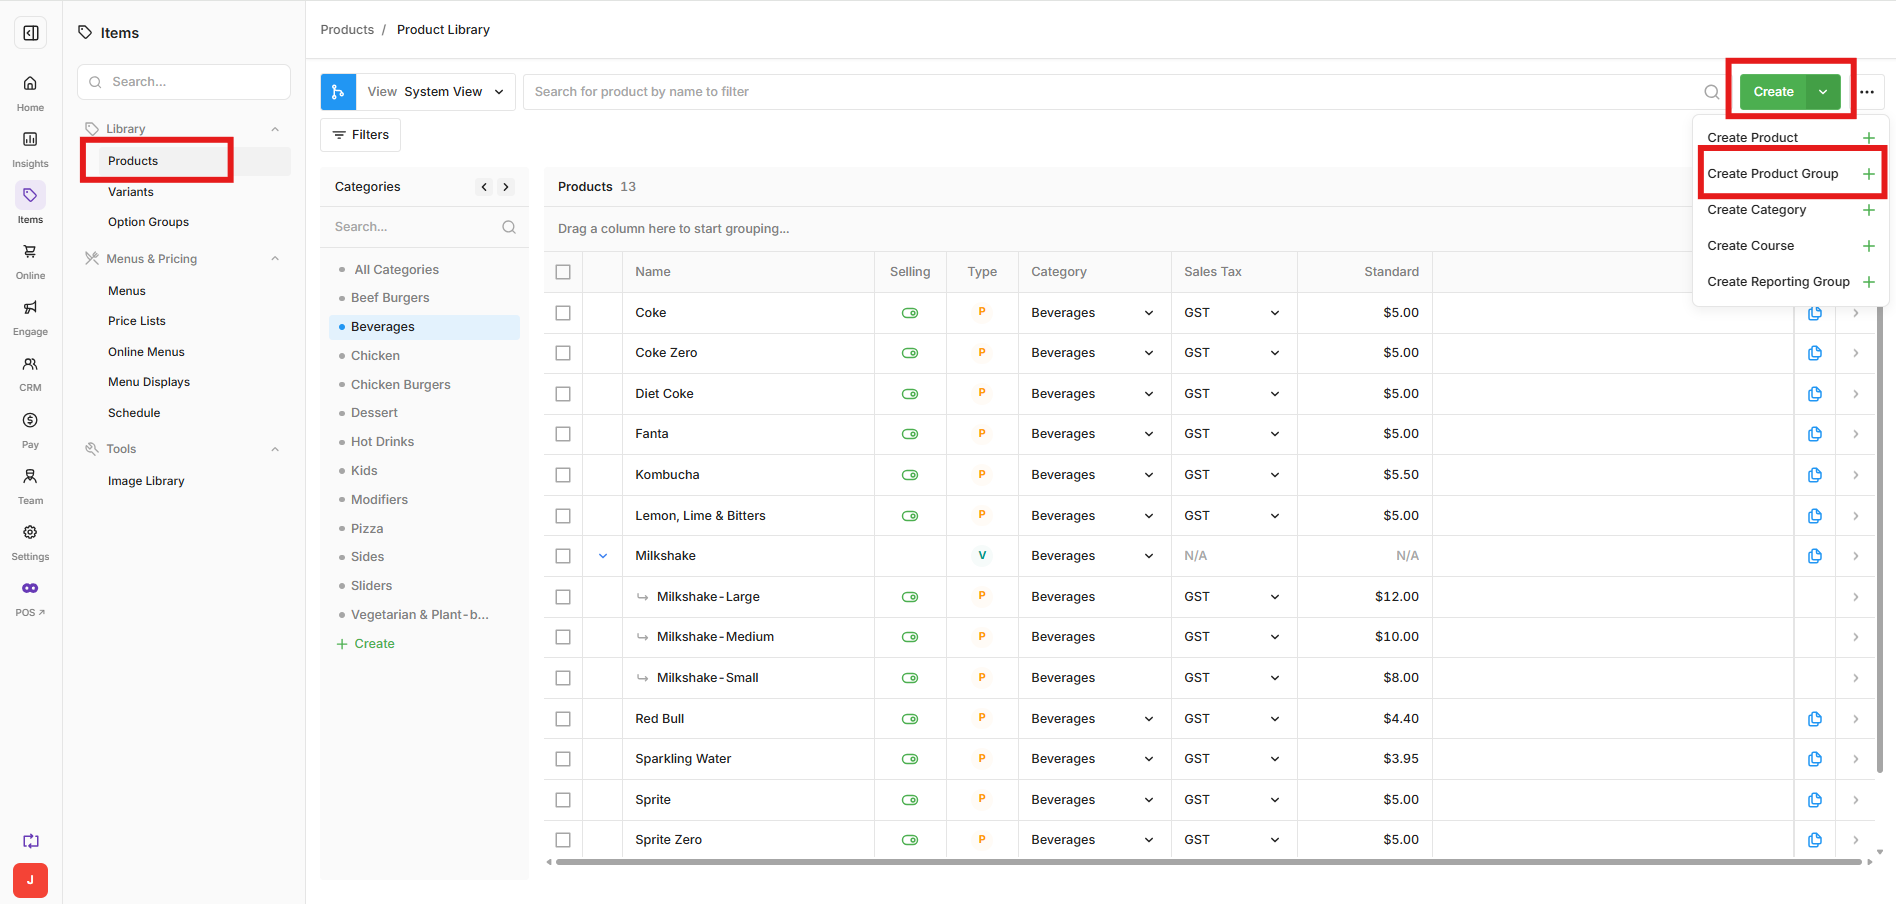
Step 1: Create Product Groups
Product Groups form the top-level structure used to organise the product list. Each product must be assigned to a Product Group when it is created.
- Open Back Office.
- Open Products.
- Select Create.
- Select Product Group.
- Enter the Product Group name.
- Select Create.
- Repeat for each Product Group required.
Keep Product Group names clear and consistent so the structure remains easy to manage as products are added.
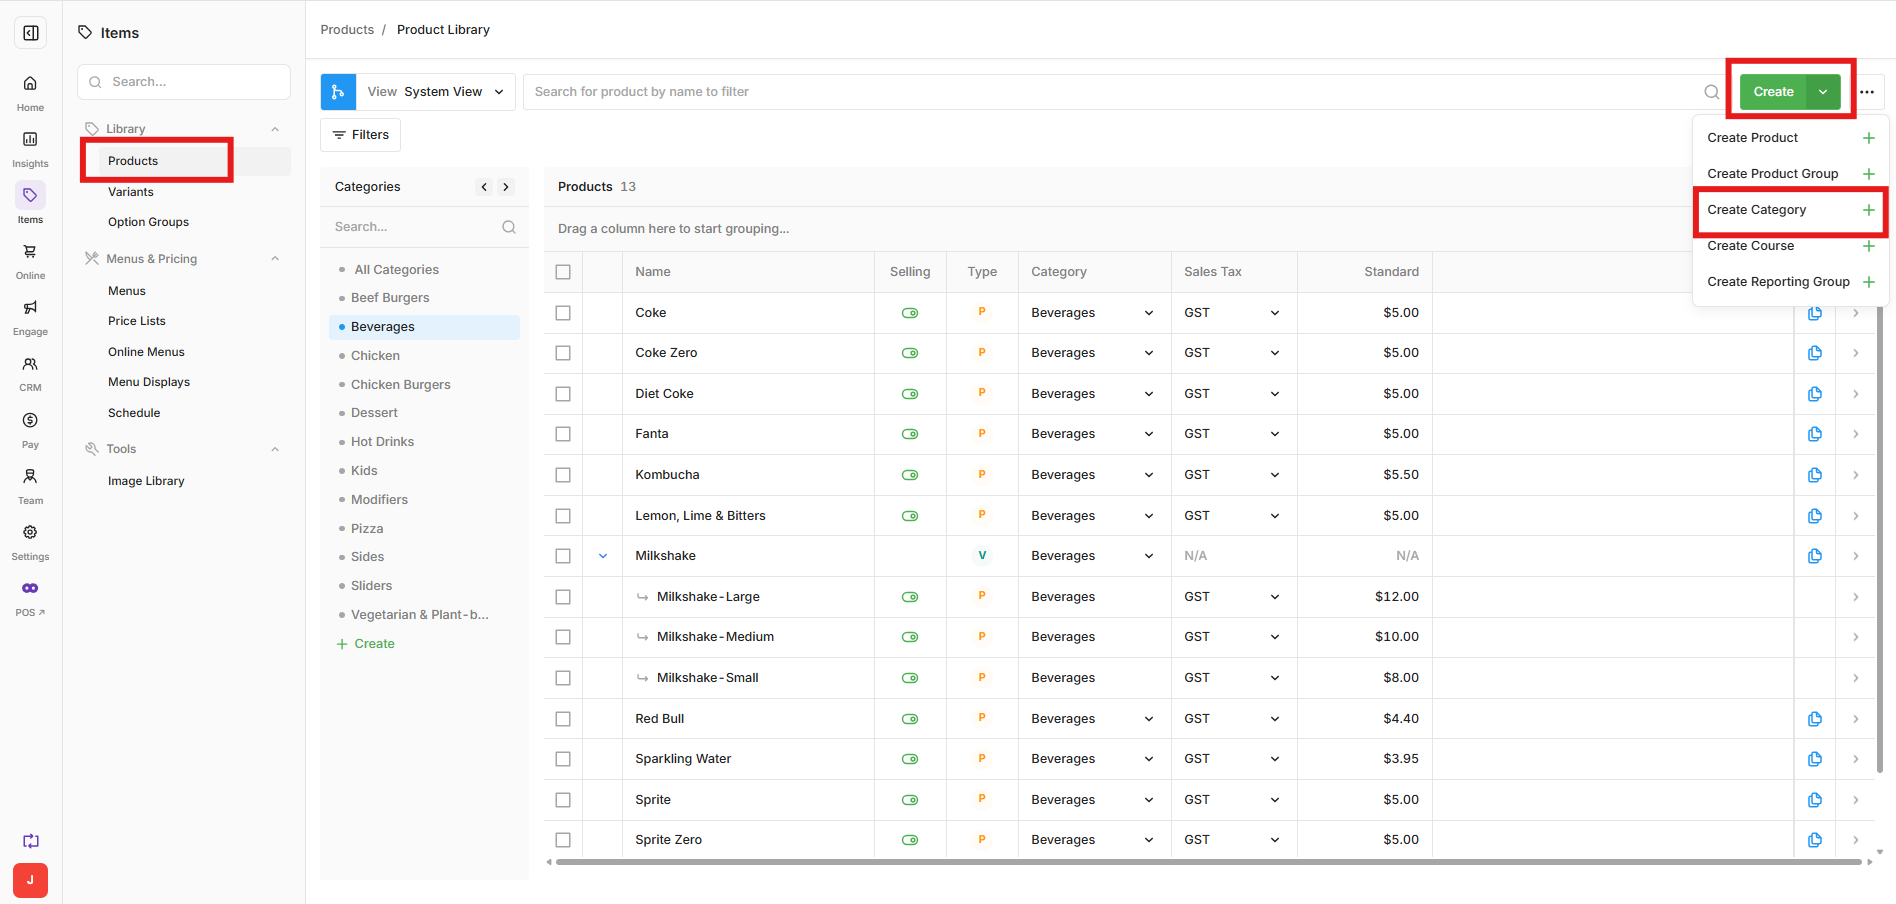
Step 2: Create Categories
Categories group similar products together and can be used in Menu Management and Insights reporting. Each product must be assigned to a Category when it is created.
For example, Categories could include:
- White Wine
- Red Wine
- Sparkling
- Beer
- Soft Drinks
- Open Back Office.
- Open Products.
- Select Create.
- Select Category.
- Enter the Category name.
- Select Create.
- Repeat for each Category required.
Keep Categories simple and easy to maintain so products can be grouped consistently.
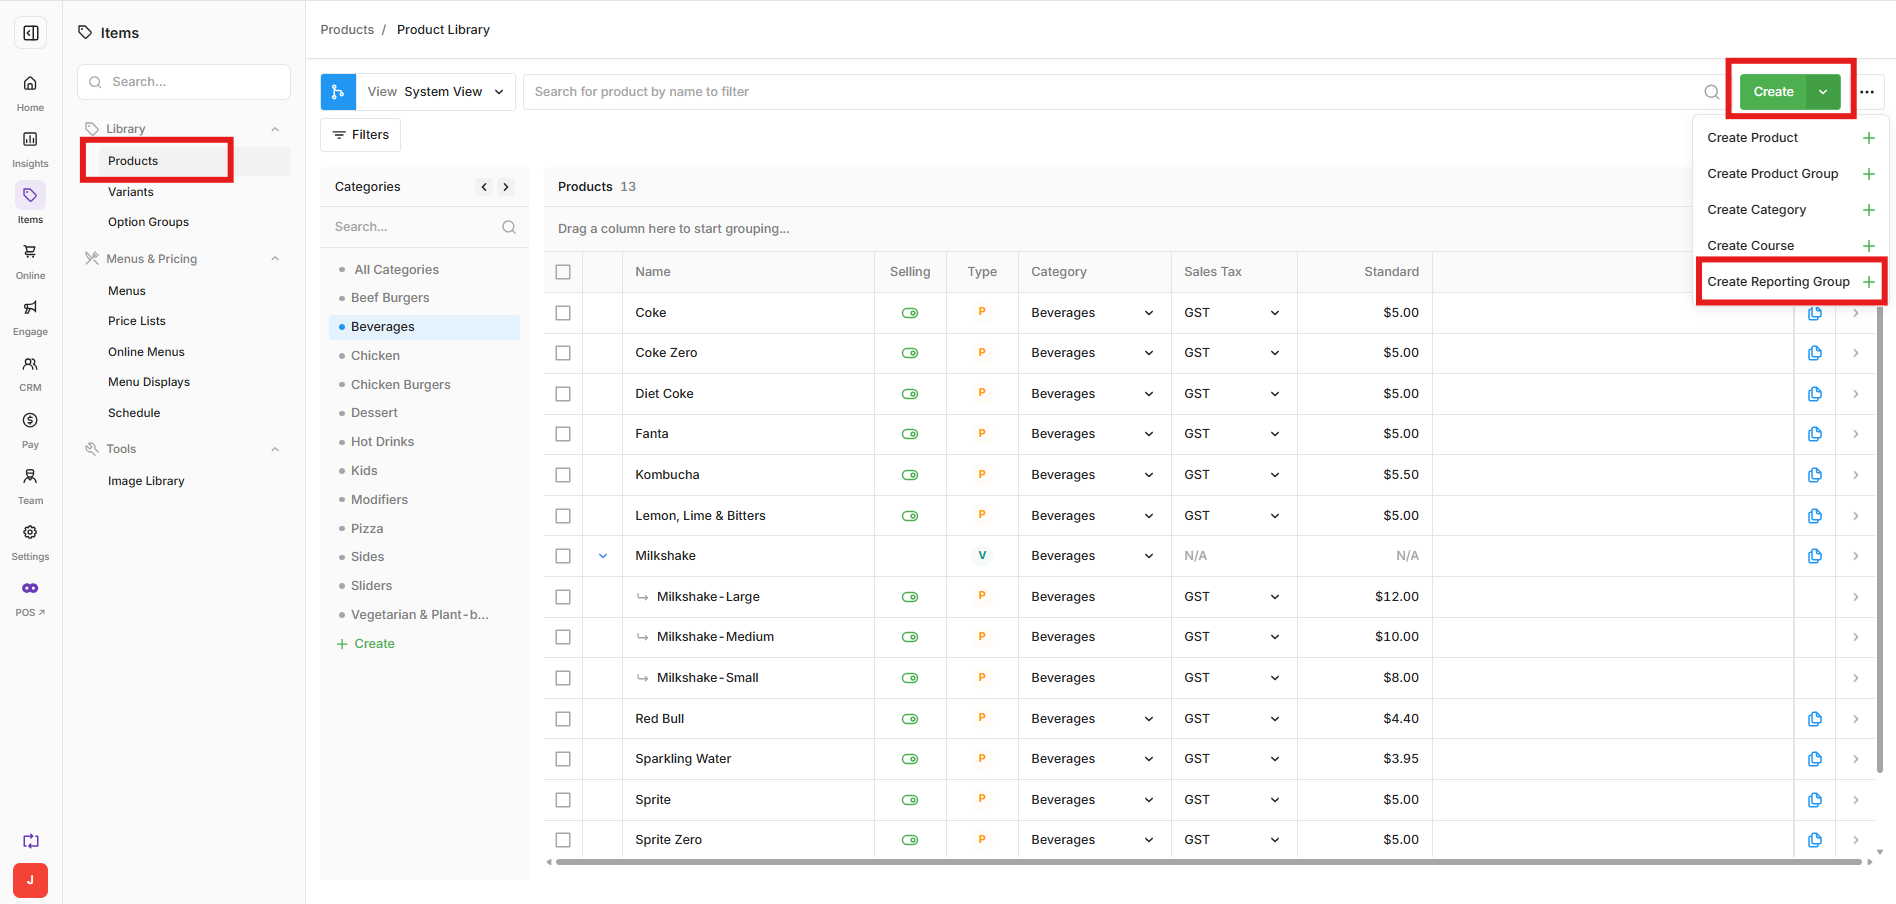
Step 3: Create Reporting Groups
Reporting Groups combine products into broader groups for higher-level reporting. Each product must be assigned to a Reporting Group when it is created.
For example, products in the White Wine, Red Wine, Sparkling, Beer and Soft Drinks Categories could all use Beverages as their Reporting Group. This allows those products to be grouped together when reviewing sales at a broader level.
- Open Back Office.
- Open Products.
- Select Create.
- Select Reporting Group.
- Enter the Reporting Group name.
- Select Create.
- Repeat for each Reporting Group required.
Once the structure is set up, the Product Groups, Categories and Reporting Groups are available to select when creating products. Categories can also be used in Menu Management, while Insights can report by Product, Category or Reporting Group.
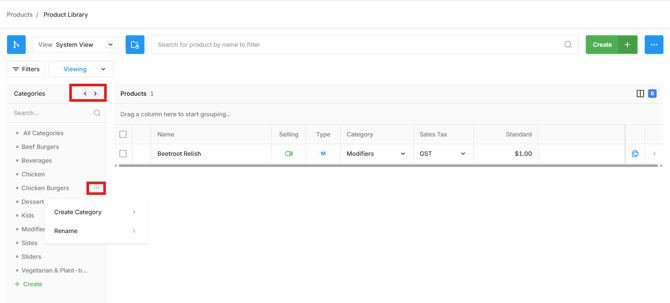
Rename a Product Group, Category or Reporting Group
Categories and Reporting Groups can be renamed after they have been created.
- Open Products.
- Under Filters, use the arrows to switch between Product Group, Category and Reporting Group
- Hover over the line to be edited and select the three dots to edit
- Rename the item.
- Save the change.