
Price Lists need to be scheduled to apply for particular order types or on particular days and times, making them suitable for pricing such as Happy Hour or other time-based offers.
Step 1: Enable Price Lists
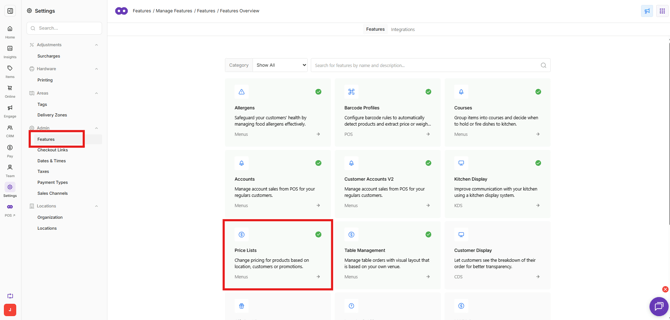
Enable the Price Lists feature before creating the first Price List.
- Open Settings > Features > Price Lists
- Select Enable.
Once enabled, Price Lists are available from Items.
Step 2: Create a Price List
Create a Price List for each set of alternative prices required. The Price List settings determine which stores and order types it applies to.
For example, a Price List could be created for:
- takeaway pricing
- online store pricing
- third-party ordering platforms such as Uber Eats
- different pricing at a particular store
- Happy Hour or other scheduled pricing
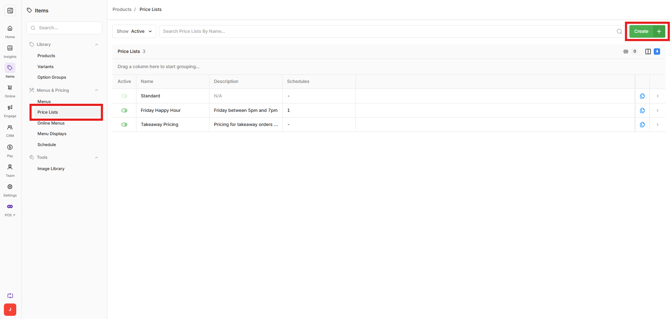
- Open Items > Price Lists.
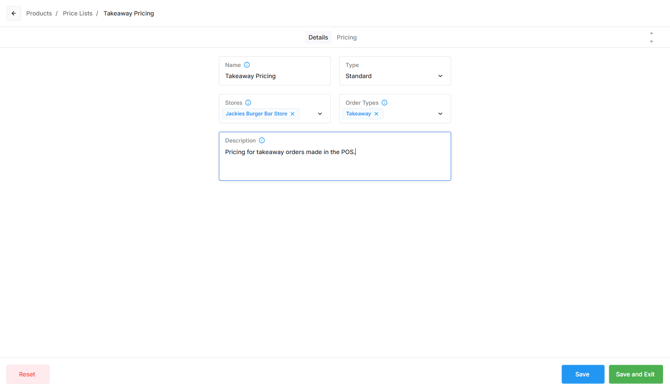
- Select Create and fill in the details:
- Name: Enter a name for the Price List.
- Type:
- Standard: the price list value overrides the product’s standard retail price.
- Discount: the price list value is treated as a discounted price, and the difference from the standard retail price is recorded as a discount.
- Stores: select which locations this price list is available at.
- Order Types: select which order types this price list applies to
- Description: to identify what the Price List is used for.
- Save the Price List.
Step 3: Set product prices
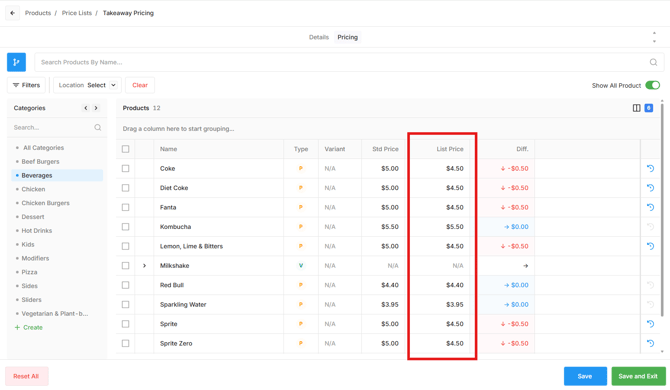
After creating the Price List, use the Pricing tab to set the selling prices that apply when that Price List is used.
- Open the required Price List.
- Select the Pricing tab.
- Find the product to update.
- Enter the required selling price for the product in the List Price column.
- Repeat for each product that requires a different price.
- Save the changes.
For example, a product sold for $20 using its standard price could be given a different price when ordered through an online store or third-party ordering platform.
Step 4: Schedule a Price List
Price Lists must be scheduled to determine when and where their pricing applies. This includes Price Lists created for a specific order type, such as Takeaway - selecting an Order Type when setting up the Price List does not automatically activate those prices.
A schedule is also useful when alternative pricing should apply only on particular days or at particular times, such as Happy Hour.
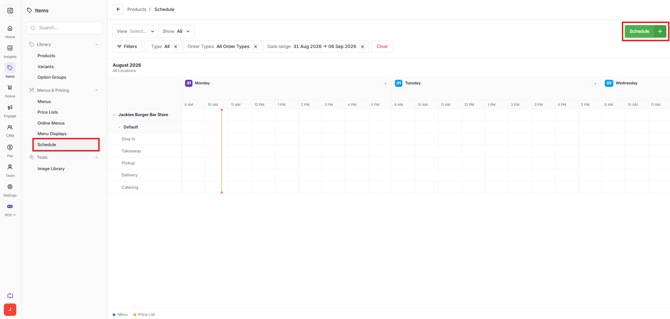
- Open Items > Schedule.
- Select Schedule.
- Select Price List Schedule.
- Select the required Price List from the dropdown.
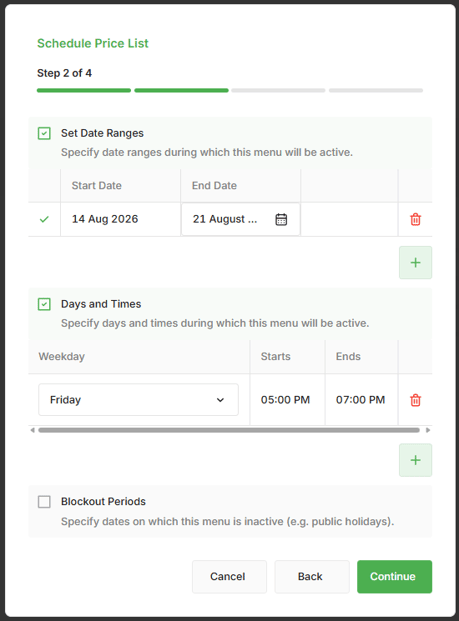
- Configure when the Price List should apply:
- Date Ranges: Set a start and end date when the Price List should apply. A date range is optional and does not need to be set for an ongoing schedule.
- Days and Times: Select the days and times when the Price List should apply.
- Blockout Periods: Exclude specific dates or periods from the schedule. Use this with the other scheduling options when pricing should not apply during a particular period.
- Select Continue.
Step 5: Select the targets and confirm the schedule
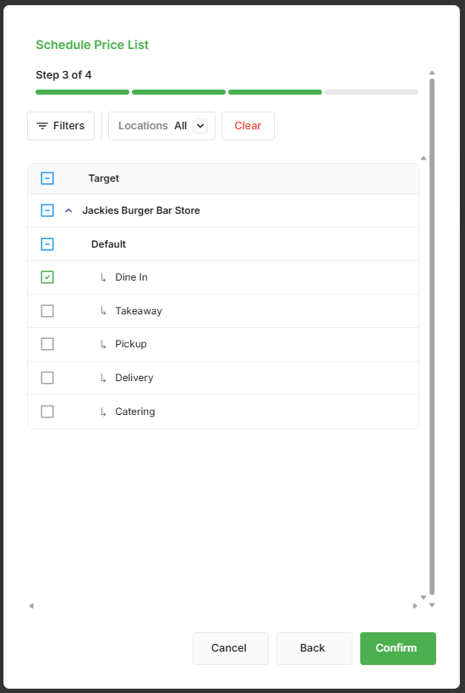
Set the targets to determine where the Price List applies.
- Select the required Locations.
- Select the required Order Types.
- Select Confirm.
- Review the Price List, schedule and targets to confirm they are correct.
- Select Schedule.
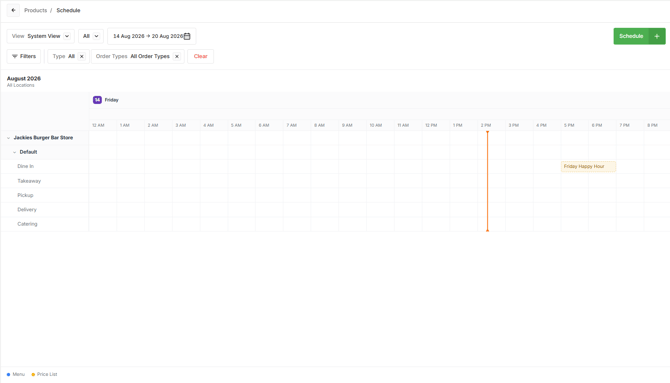
The scheduled Price List is added to the Schedule calendar, where its scheduled dates and times can be viewed.
Overlapping schedules
Oolio One prevents multiple Price List schedules from applying to the same Order Type at the same time.
If a new schedule overlaps an existing schedule for the same Order Type and period, a warning is displayed. Continuing with the new schedule overrides the affected existing schedule.
Review the warning and affected schedule before confirming the change.