Products are the items sold through Oolio One and can appear on POS, Kiosk and online ordering channels. Products are created in Oolio One Back Office and can include pricing, availability, dietary information, variants and ordering options to control how the item is sold across different channels.
Step 1. Create the Product
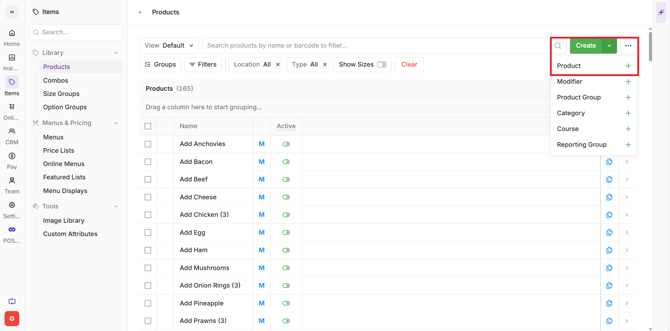
- Open Back Office > Items > Products.
- Select Create.
- Select Product.
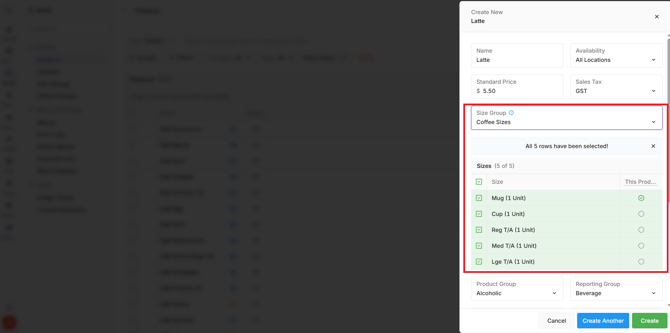
- Name: Enter the product name. This is the default name unless an alternative is configured.
- Availability: Select the locations where the product will be available.
- Standard Price: Enter the selling price associated with the Standard Price List.
- Sales Tax: Select the applicable tax code.
- Size Group: Select a Size Group if the product is sold in multiple sizes, such as Small, Medium or Large. Confirm the available sizes and select the default size.
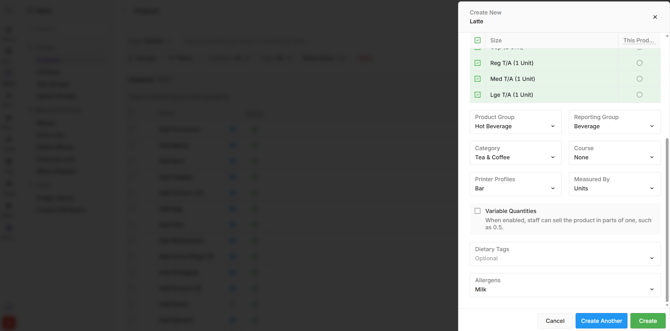
- Product Group: Select where the product will appear in the Product Tree.
- Reporting Group: Select the appropriate reporting group, such as Food or Beverage.
- Category: Select the relevant category used for menus, layouts and reporting.
- Course: Select a course if enabled and applicable, such as Starters, Mains or Desserts.
- Printer Profiles: Select where the product should print when ordered, such as Bar or Kitchen.
- Measured By: Select how the product is sold, such as Units, Volume or Weight.
- Variable Quantities: Enable if the product can be sold in partial quantities, such as half an item.
- Dietary Tags: Assign relevant dietary information, if enabled.
- Allergens: Assign applicable allergens, if enabled.
4. Select the required action:
-
- Create: Save the product and return to the product list.
- Create Another: Save the product and open another creation form.
- Cancel: Discard the changes.
The product is created and becomes available in the Product Tree for further configuration.
Configure Optional Product Details
Additional product information can be configured after the Standard Product has been created.
- Open Items > Products.
- Locate the product in the Product Tree, select Groups in the filter row to expand the Product Tree.
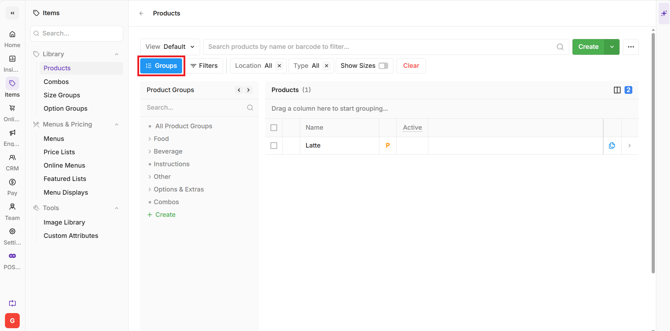
- Select the arrow to the right of the product.
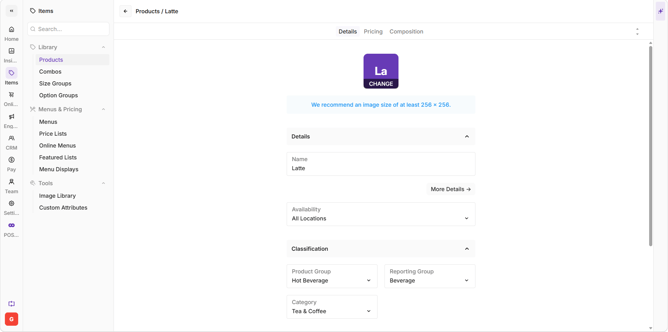
- Open the Details tab.
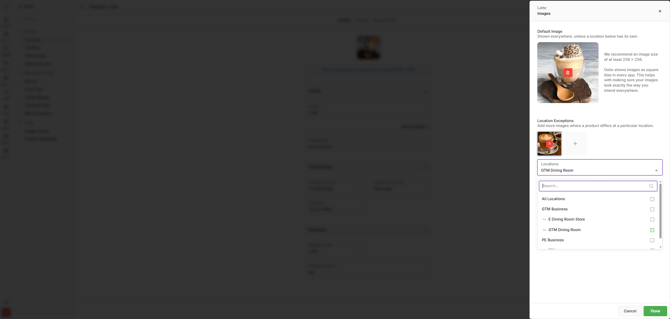
- Add an image if required; select Change on the image square.
- Add alternate images per Location using the green +.
- Review the Name field and update it if required.
- Select Done to return to the Product List.
- Select More Details to open the right-hand side drawer.
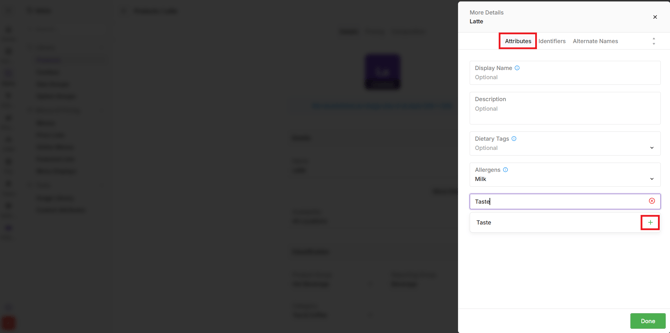
Attributes
The Attributes tab contains additional product information and customer-facing details.
- Display Name: Enter an alternative name to display to customers, if required.
- Description: Enter a brief description displayed on customer-facing channels, including online ordering.
- Dietary Tags: Add or remove relevant dietary tags.
- Allergens: Add or remove applicable allergens.
- Custom Attributes: Search for and assign Custom Attributes to the product, such as wine variety, origin or tasting notes.
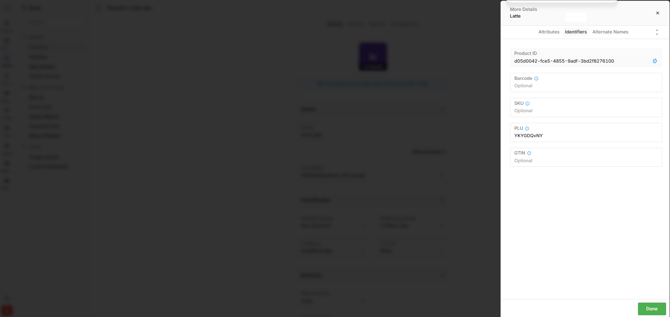
Identifiers
The Identifiers tab contains product reference information.
- Product ID: A unique identifier generated when the product is created.
- Barcode: Enter the barcode associated with the product for scanning at POS.
- SKU: Enter an optional Stock Keeping Unit reference.
- PLU: Enter a Price Look Up code for the product.
- GTIN: Enter a Global Trade Item Number, where applicable.
Alternate Names
The Alternate Names tab allows different product names to be configured for specific uses.
- POS Name: Enter an alternative product name for POS.
- Kitchen Name: Enter the name displayed or printed in the kitchen.
- Translations: Enter the required Chinese translations.
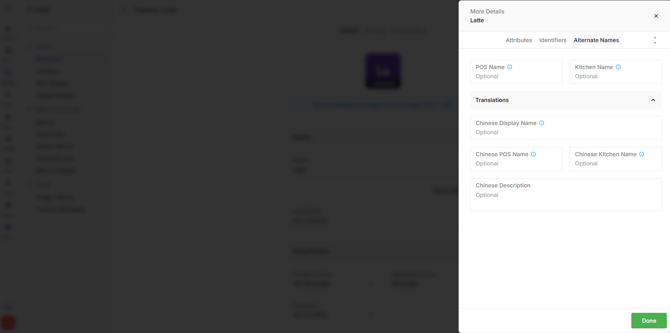
Select Done when complete to return to the Product List.
Classification & Behaviour
The Classification and Behaviour sections control how the product is organised, measured and routed for printing.
Classification:
- Product Group: Select where the product appears in the Product Tree.
- Reporting Group: Assign the product to the appropriate reporting group.
- Category: Select the category used for menus, layouts and reporting.
- Option Groups: Assign relevant Option Groups if the product requires modifiers, such as milk choices, pasta types or additional ingredients.
Behaviour:
- Measured By: Select how the product is sold, such as Units, Volume or Weight.
- Printer Profiles: Select where the product should print when ordered, such as Bar or Kitchen.
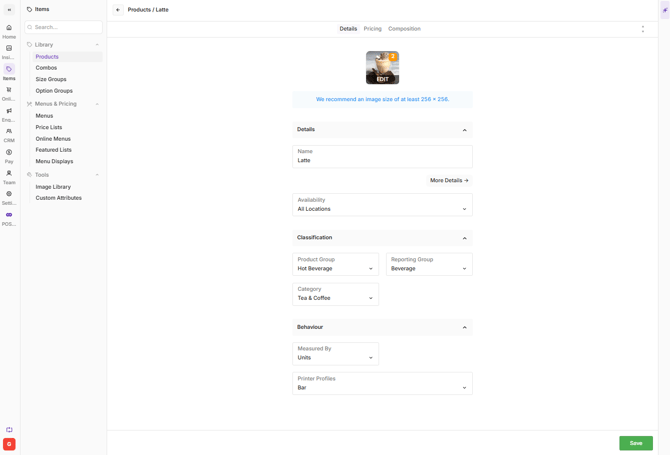
Save the changes once the required information has been configured.
Step 3. Configure Product Pricing
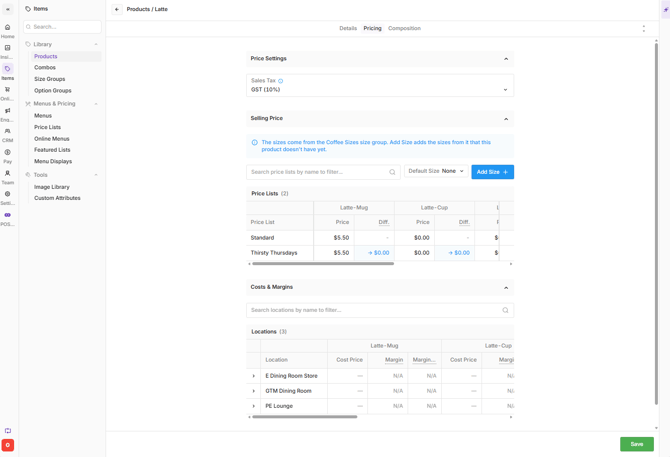
The Pricing tab controls selling prices, tax settings, product sizes and cost information.
- Open Items > Products.
- Locate and select the required product.
- Open the Pricing tab.
Price Settings
- Sales Tax: Review or update the tax code applied when selling the product.
- Min / Max Price: Configure minimum and maximum prices if variable pricing is enabled.
Selling Price
- Price Lists: Review and update prices across the available Price Lists. Scroll horizontally to view pricing for additional sizes.
- Add Sizes: Select Add to assign additional sizes from the attached Size Group.
Costs & Margins
- Cost: Enter the product's cost price per location and size, if required.
- Margin: Enter the desired revenue margin for each applicable location and size.
Step 4. Configure Product Options
The Options tab controls product modifiers, upsells and combo upgrade suggestions.
- Open Items > Products.
- Locate and select the required product.
- Open the Options tab.
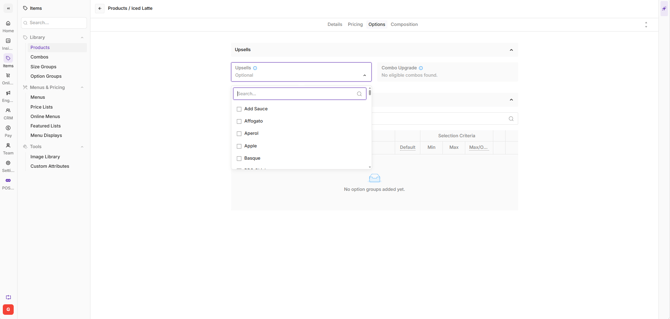
Upsells
Upsells allow related products to be suggested during ordering.
- Locate Upsells.
- Search for the product to recommend.
- Select the required product from the list.
For example, a coffee product could suggest a slice of cake as an upsell.
Combo Upgrade
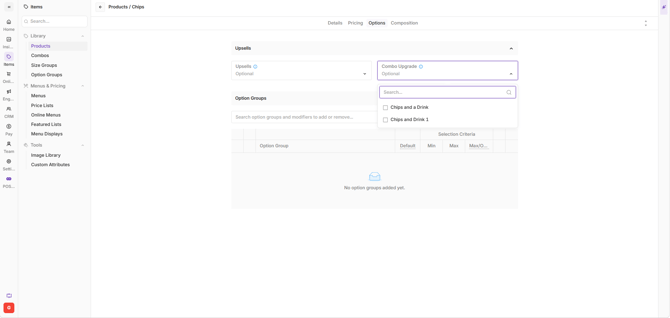
Combo Upgrade allows a relevant combo to be offered when the product is selected.
- Locate Combo Upgrade.
- Search for the required combo.
- Select the combo to associate with the product.
For example, hot chips could offer an upgrade to a chips and drink combo.
Option Groups
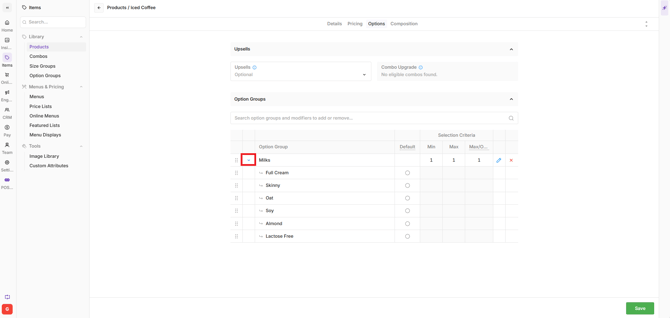
Option Groups allow customers or staff to select modifiers when ordering a product.
- Locate Option Group.
- Search for and select the required Option Group.
- Configure the selection rules:
- Min & Max: Set the minimum and maximum number of selections allowed.
- Max Per Option: Set the maximum quantity permitted for an individual option.
- Select the expand arrow to view the options within the group.
- Configure a default option, if required.
- Repeat for any additional Option Groups.
To manage an assigned Option Group:
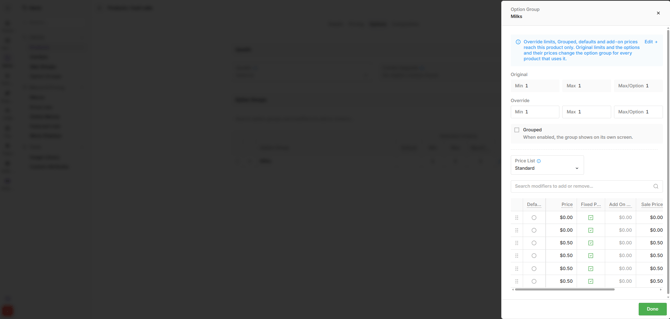
- Select the pencil icon to edit the group.
- Select the red X to remove the group from the product.
For example, a coffee product could use a Milk Options group containing Full Cream, Skim, Soy, Almond and Oat Milk.
Save the changes.
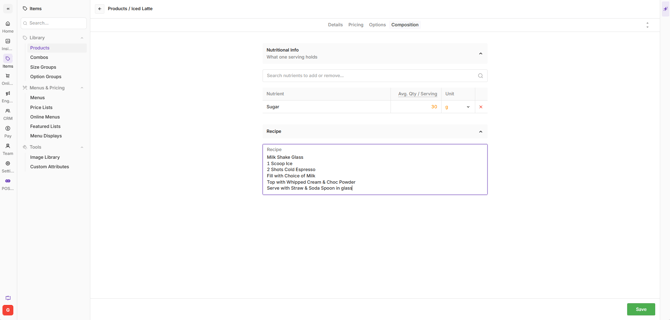
Step 5. Configure Product Composition
The Composition tab contains nutritional information and recipe details associated with the product.
- Open Items > Products.
- Locate and select the required product.
- Open the Composition tab.
- Configure the required nutritional information and recipe details.
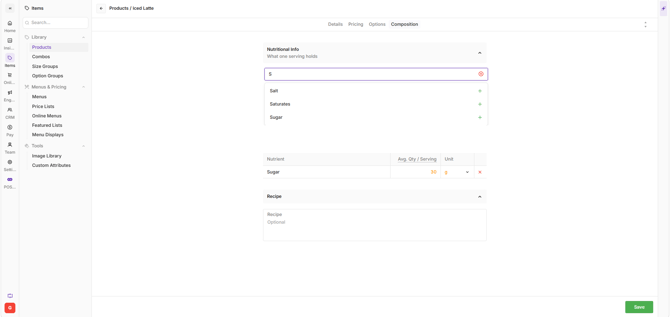
Nutritional Info
Nutritional information can be assigned to a product using the available nutrient list.
- Locate Nutritional Info.
- Search for the required nutrient.
- Select the + icon to add it to the product.
- Enter the Avg. Qty per Serving value using the applicable unit displayed.
- Repeat for any additional nutrients.
To remove a nutrient, select the red X alongside it.
Recipe
The Recipe field allows preparation instructions or other recipe information to be recorded against a product.
- Locate Recipe.
- Enter the required recipe or preparation instructions.
- Save the changes.
For example, the Recipe field could contain the ingredients and preparation steps for a cocktail or instructions for assembling a food dish.