
Discounts are created in Back Office to reduce the price of an order or selected products by a fixed dollar amount or percentage. Discounts can be applied manually or automatically and can be restricted by location, sales channel, order type, customer group, user role, payment type, usage limits and schedule.
Four Discount Types are available:
- Standard Discount: Applies a fixed dollar or percentage discount on any product or the order, without requiring specific products, categories or purchase quantities eg Staff Discount or $10 off.
- Product or Category Discount: Applies a Discount to selected Products or Categories eg 10% off Coffees.
- Quantity-Based Discount: Applies a Discount when a specified quantity of eligible Products or Categories is added to the cart eg Buy 2 Coffees Get 10% off.
- Free or Discounted Product: Adds selected products with a discount once eligible products reach their specified quantities in the cart eg Buy One, Get One Free.
Step 1: Create a Discount and configure Details & Availability
Start by selecting the Discount Type that matches the promotion or pricing rule required. The Details settings are common across all Discount Types.
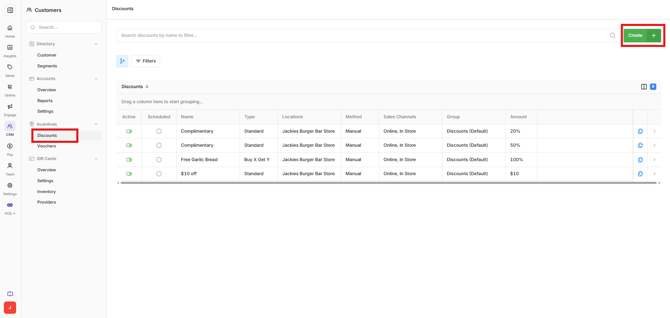
- Open Back Office > CRM > Discounts.
- Select Create.
- Select the required Discount Type.
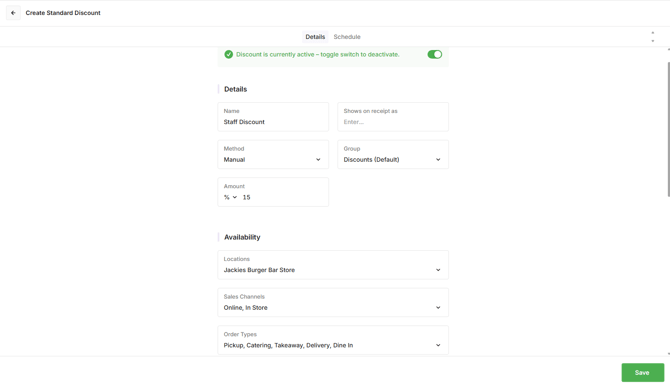
- Complete the Details:
- Name: Enter a name that clearly identifies the Discount.
- Shown on Receipt as: Enter alternative text to display on the customer's receipt if required.
- Method: Choose whether the Discount is applied or automatically assigned.
- Manual: The discount is selected and applied when required.
- Automatic: The discount is applied automatically when its conditions are met. A schedule must also be configured for the discount to apply automatically.
-
- Group: Select the reporting group used to group the Discount for reporting.
- Amount: Enter the Discount amount and select whether it is a dollar value or percentage.
- Configure the required Availability:
- Locations: Select the locations where the Discount is available.
- Sales Channels: Select where the Discount can be used, such as in-store, online or all applicable channels.
- Order Types: Select the Order Types where the Discount can apply.
- Customer Groups: Restrict the Discount to a particular Loyalty customer group if required.
- Roles: Select which user Roles can apply the Discount.
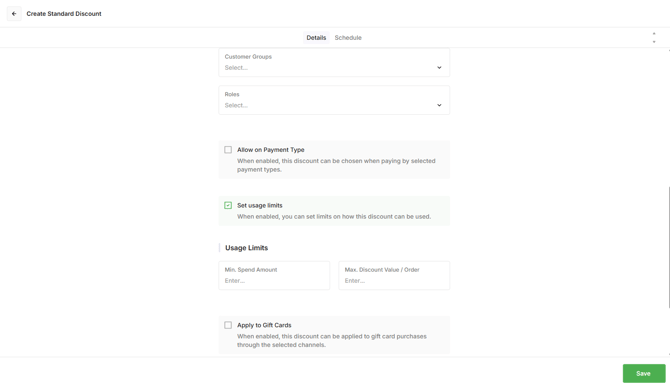
- Allow on Payment Type: Enable this when the Discount should only be available for a specific payment type.
- Set Usage Limits: Enable this to configure a Minimum Spend or Max Discount Value per Order.
The remaining settings depend on the Discount Type selected.
Configure a Standard Discount
A Standard Discount applies the configured dollar or percentage Discount without requiring specific products, categories or purchase quantities.
For a Standard Discount, Apply to Gift Cards is also available. Enable this setting if the Discount is allowed to apply to Gift Card purchases.
Configure a Product or Category Discount
A Product or Category Discount restricts the Discount to selected products or categories.
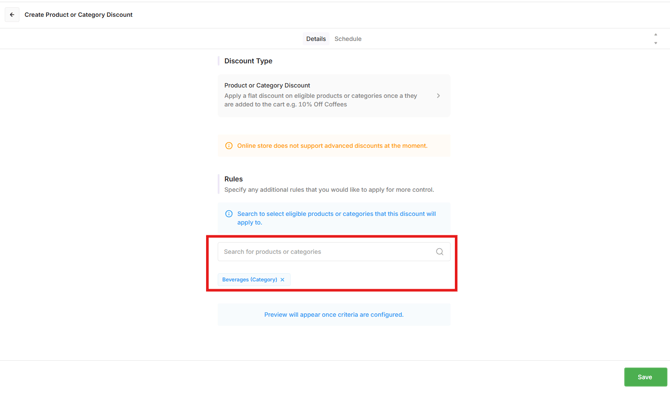
- After filling in the Details and Availability settings, scroll down to Rules and search for the product or category eligible for the Discount.
- Select the product or category to add it.
- Repeat for any additional products or categories.
- Review the explanation displayed at the bottom of the screen to confirm how the Discount will apply.
- Select Save.
Configure a Quantity-Based Discount
A Quantity-Based Discount applies when a specified quantity of eligible products or categories is added to the cart.
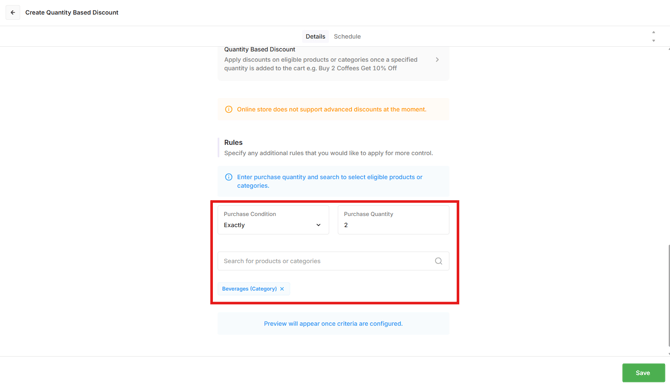
- After filling in the Details and Availability settings, scroll down to Rules and select the required Purchase Condition:
- Exactly: The specified quantity must be added to the cart.
- Greater Than: The quantity in the cart must be greater than the specified quantity.
- Enter the required Purchase Quantity.
- Search for the eligible products or categories.
- Select Save.
For example, a 10% Discount could apply per when two Beverage products are added to the order.
Configure a Free or Discounted Product Discount
Use Free or Discounted Product when purchasing a specified quantity makes another eligible product free or discounted.
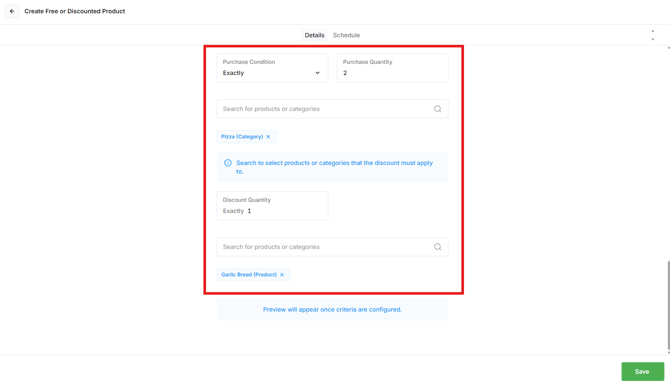
- After filling in the Details and Availability settings, scroll down to Rules and select the required Purchase Condition:
- Exactly: The specified quantity must be added to the cart.
- Greater Than: The quantity in the cart must be greater than the specified quantity.
- Enter the required Purchase Quantity.
- Search for the eligible products or categories.
- Enter the Discount Quantity to determine how many eligible products added below receive the Discount.
- Search for the eligible products or categories.
- Select Save.
For example, when two eligible pizzas are added to an order, one garlic bread could receive a 100% discount.
Step 2: Schedule the Discount
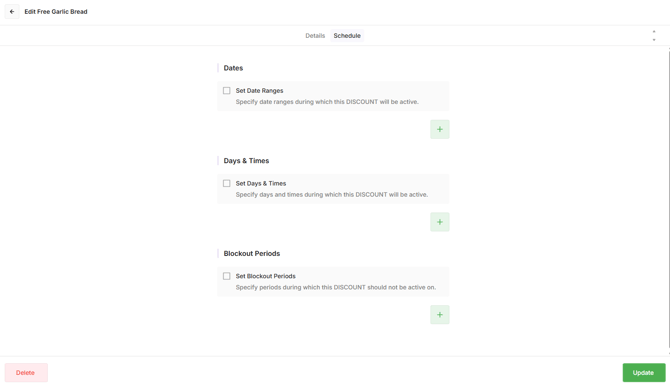
Schedules control when the discount is available, including specific dates, days and times. If the discount Method is set to Automatic, a schedule must be configured for the discount to apply automatically. Without a schedule, an Automatic discount will not be applied.
The available scheduling options are:
- Dates: Set the date range when the Discount is available.
- Days and Times: Set specific days and trading periods, such as Wednesday, Thursday and Friday from 5 pm to 8 pm.
- Blockout Periods: Exclude specific periods when the Discount should not apply, such as a public holiday that falls within the scheduled period.
The scheduling options can be used together. For example, a promotion could run for one month but only apply from 5 pm to 8 pm on selected days.
For an all-day Discount that runs every day within a particular date range, set Dates and leave Days and Times empty.
The Discount is now available according to its configured method, availability, Discount Type conditions and schedule.