
Connect Doshii to Oolio One to share menu, pricing and order information with supported integration partners. Before enabling the integration, provide Doshii with the Oolio One Store ID so the venue can be created or linked in Doshii.
Before starting
Before configuring the integration:
- Confirm the Store that will connect to Doshii.
- Have access to Oolio One Back Office.
- Provide the Oolio One Store ID to Doshii.
- Confirm which Menu, Price List and Devices should be used for the integration.
Step 1: Find the Oolio One Store ID
From Oolio One Back Office:
- Go to Settings > Locations > Store.
- Select the required Store.
- Check the web address displayed in the browser.
- Find the number between
store/and/details.
-
This number is the Store ID.
-
For example, if the URL contains:
-
store/12345/details/
-
-
The Store ID is:
-
12345
-
-
Step 2: Provide the Store ID to Doshii
Doshii requires the Oolio One Store ID to create or link the venue in its system.
If the venue has already been set up with Doshii, only the Store ID may be required.
Submit a request using this 🔗 Doshii Support Form and include:
- Store Name
- Store ID
Step 3: Enable Doshii
From Oolio One Back Office:
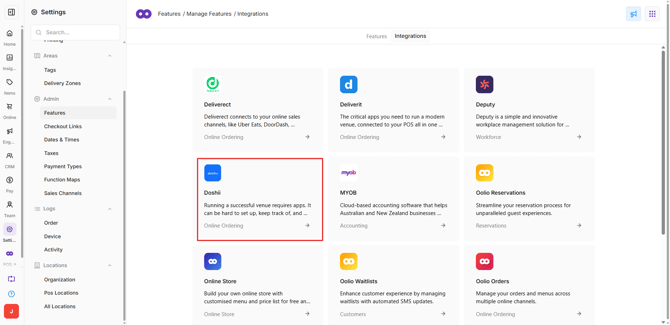
- Go to Settings > Features.
- Select the Integrations tab.
- Select Doshii.
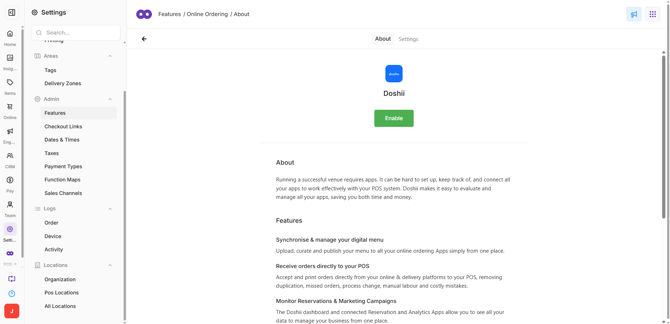
- Select Enable.
- Select the Cog icon to open the Doshii configuration settings.
Step 4: Select the Menu
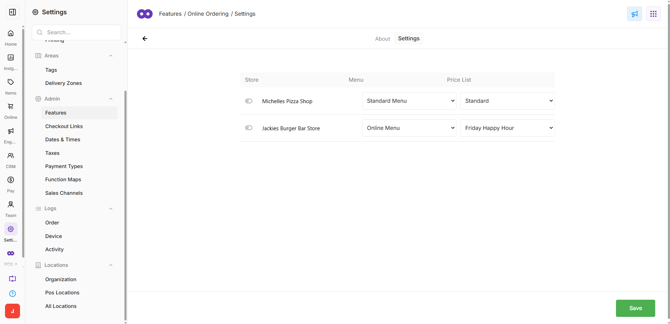
Select the Menu to publish to Doshii.
The appropriate Menu depends on the integration using Doshii. For example, a stock control integration may require a Menu containing all Products.
If the Standard Menu is not suitable, create a copy and assign the required Menu to Doshii instead.
Step 5: Select the Price List
Select the Price List to use for the Doshii integration.
If different pricing is required for Doshii, create and assign a separate Price List.
If the Standard Price List is not suitable, create a copy specifically for the integration.
Step 6: Select the Devices
Choose which Devices should be included in the Doshii integration.
-
Devices can include POS terminals or iPads.
-
The selected Devices determine where integrated orders are received and how stock is updated.
Surcharges and Discounts:
-
Surcharges and Discounts configured to automatically apply in Oolio One are also applied to Doshii-connected sales channels.
Step 7: Save the Doshii settings
After completing the required configuration, select Save in the bottom-right corner.
Saving the configuration pushes the information to Doshii and the connected integration partners.
Update a Menu or Price List:
-
After making changes to the Menu or Price List assigned to Doshii:
- Make the required changes to the assigned Menu or Price List.
- Return to the Doshii Settings screen.
- Select Save.
-
Selecting Save manually pushes the updated information to Doshii and the connected integration partners.
Important: After changing an assigned Menu or Price List, return to the Doshii Settings and select Save to push the latest information.
Set Operating Hours:
-
Operating Hours can optionally be configured from the Doshii Settings in Oolio One Back Office.
-
Set the required opening and closing times for the venue.
Note: Operating Hours may be overridden by settings configured in the Doshii Dashboard or a connected third-party platform.
DoorDash Operating Hours
DoorDash automatically subtracts 20 minutes from the configured closing time to prevent orders from being placed immediately before closing.
For example, if the configured closing time is 8:10 PM, DoorDash will stop accepting orders at 7:50 PM.