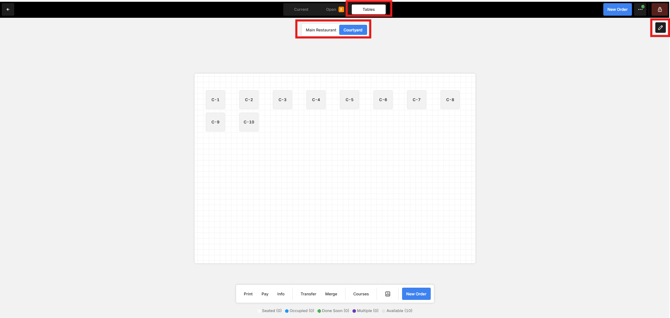
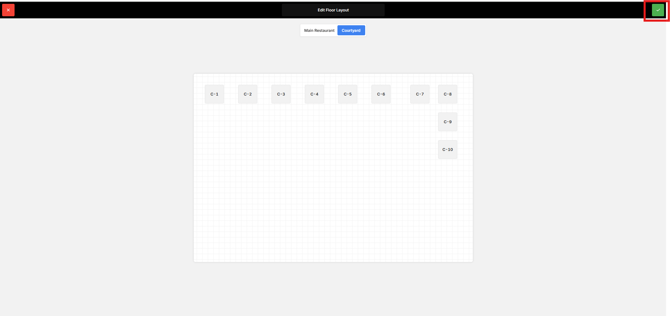
Table Management allows sections and tables in a venue to be represented on the Floor View in Oolio One POS. Sections and tables are configured for each venue in Oolio One Back Office, then assigned to Device Profiles to control which areas are available on each POS device.
Different Device Profiles can display different sections, allowing POS devices to be configured for the areas of the venue where they are used.
Step 1: Enable Table Management
Table Management must be enabled before sections and tables can be configured.
- Open Back Office > Settings > Features > Table Management.
- Select Enable.
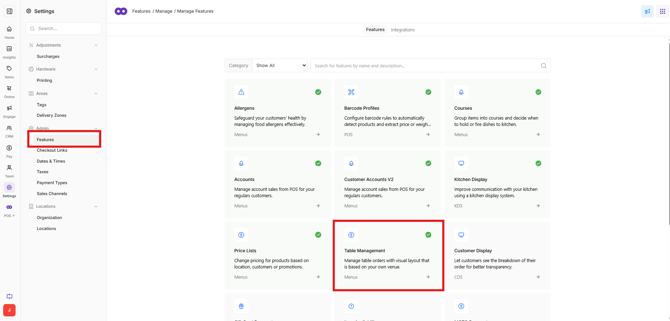
Table Management is now available to configure.
Step 2: Create a section
Sections represent different areas of the venue and contain the tables displayed in POS.
- Open Back Office > Settings > Locations.
- Select the required Venue.
- Open Sections & Tables.
- Select Create.
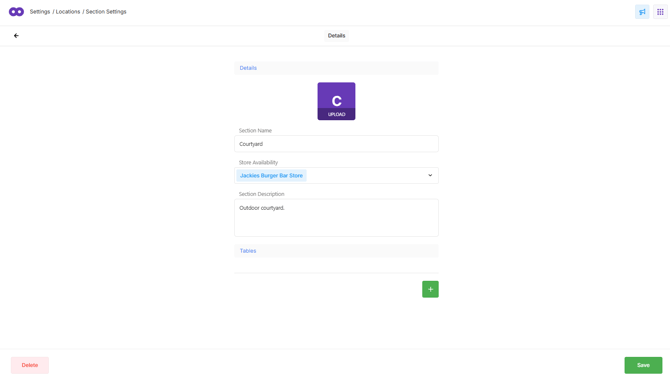
- Under Details, enter the Section Name, select the Location where this section is available and enter a description.
- Select Save.
Use a name that staff will recognise, such as Restaurant, Bar, Courtyard or Upstairs, as the Section Name is displayed in POS.
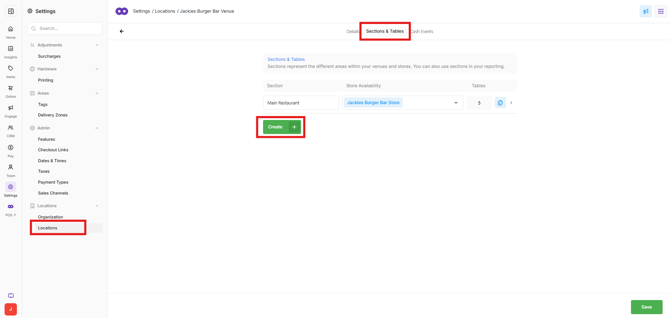
Step 3: Add tables to the section
After creating the section, add the tables that belong to that area of the venue.
- Select the green +.
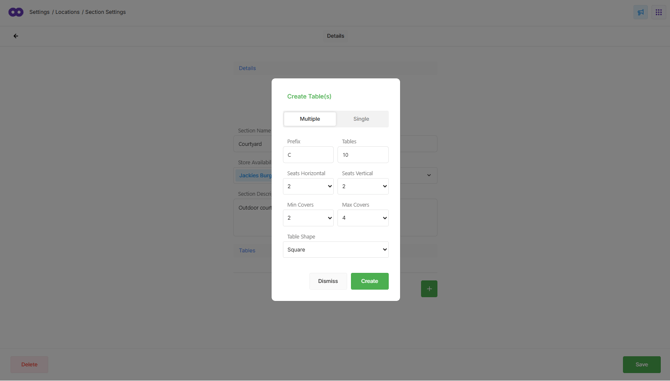
- Choose whether to create a single table or multiple tables.
- Enter a Prefix for the tables. This is used as part of the table name or number displayed in POS.
- If creating multiple tables, enter the number of tables to create.
- Enter Seats Horizontal and Seats Vertical: these settings determine the visual size of the table displayed on the Floor View. These settings do not limit the number of guests who can be seated at the table.
- Enter the Min Covers and Max Covers. These values are used with the Bookings feature to determine the minimum and maximum number of guests that can be accommodated at the table.
- Select the required Table Shape to control how the table is represented on the Floor View.
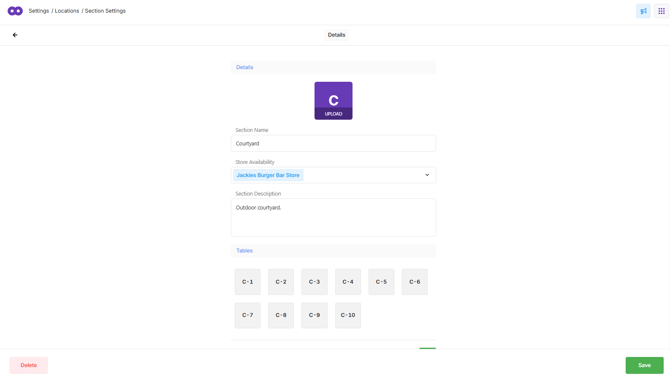
- Select Create. The tables are now created and added to the section. Repeat this process to create any additional tables required for the section.
Step 4: Assign sections to a Device Profile
Assign sections to Device Profiles to control which sections are available on each POS device.
For example, a POS in the bar might only need access to the Bar and Courtyard sections, while a restaurant POS could have access to Restaurant, Private Dining and Courtyard.
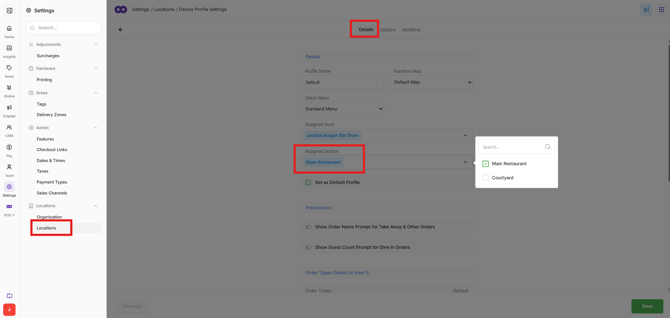
- Open Back Office > Settings > Locations.
- Select the required Store.
- Select Device Profiles and into the required Device Profile.
- Under Details, find Assigned Section.
- Add the required sections and select Save.
Multiple sections can be assigned to the same Device Profile.
Important: When multiple sections are assigned, the order in Assigned Section determines the order in which the sections appear in POS.
Step 5: Enable Floor View
Floor View provides access to the assigned sections and tables from POS.
- In the Device Profile, select the Options tab.
- Enable Enable Floor View and select Save.
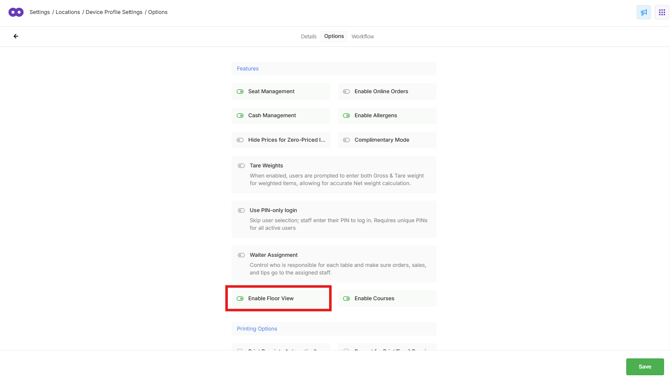
The Device Profile is now configured to display the assigned sections and tables in Oolio One POS.
Note: Seat Management can also be enabled when products need to be assigned to individual seats or guests. It is not required to use Table Management.
Step 6: Arrange the Floor View in POS
After sections and tables have been created in Back Office, arrange the tables on the Floor View in Oolio One POS to match the venue layout.
- Log in to Oolio One POS.
- Select Tables.
- Select the section to arrange.
- Select the pencil icon to edit the Floor View.
- Select and drag each table to the required position.
- Select the green tick to save the changes.
The updated table arrangement is saved for the selected section.
Sections and tables are now configured and ready to use in Oolio One POS.