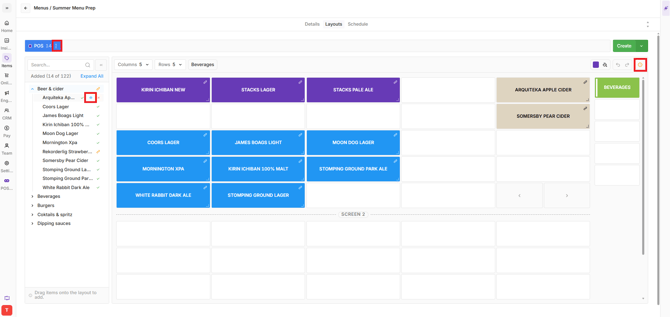
Menus in Oolio One control which products are available across supported ordering channels, including POS, mPOS, Kiosk and Online Store. Products are maintained in the Product Library, while menus determine which products are included and layouts control how they are presented to staff and customers.
The Menus experience brings menu configuration, product selection and layouts together in Oolio One Back Office, allowing menu layouts to be created and managed for different locations and ordering channels.
Understand Menus and Layouts
- Menus: Define which products are included in a menu and where they are available.
- Layouts: Control how menu products are arranged and displayed for the relevant channel or device.
For example, a location could use the same products in both Lunch and Dinner menus, with different layouts for POS and Online Store.
Step 1. Open Menus
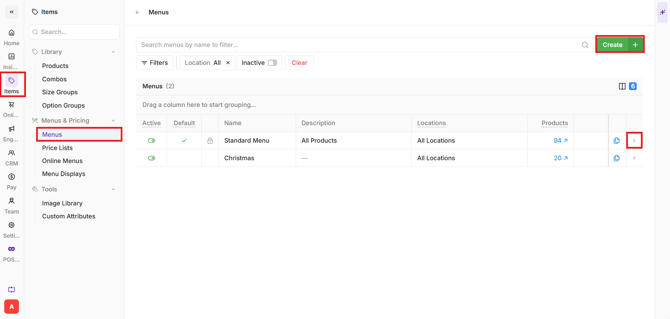
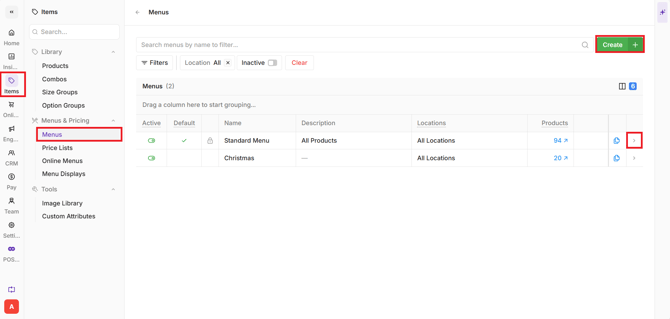
- Open Back Office > Items > Menus & Pricing > Menus
- Review any existing menus in the list.
- Select a menu to open its details or use the available create action to add a new menu.
Step 2. Create a New Menu
- Open Back Office > Items > Menus & Pricing > Menus
- Select Create.
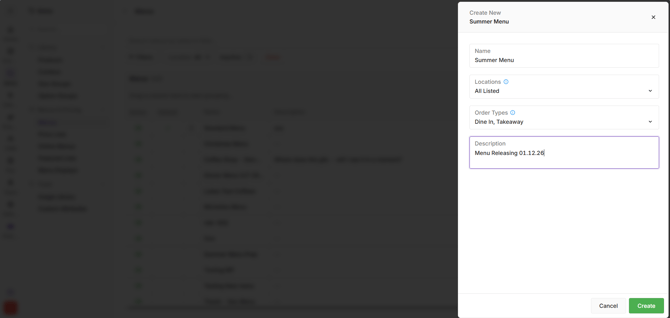
- Enter a Name, such as Lunch, Dinner or All Day Dining.
- Select the Locations to apply the menu to.
- Select the Ordering Types, where available.
- Add a description if required, eg. Releasing menu 01.12.2026.
- Save the menu.
The menu is created and ready for layout configuration.
Step 3. Create a Layout
- Open Back Office > Items > Menus & Pricing > Menus
- Select the menu to be configured using the > beside the menu.
- Go to the Layouts tab.
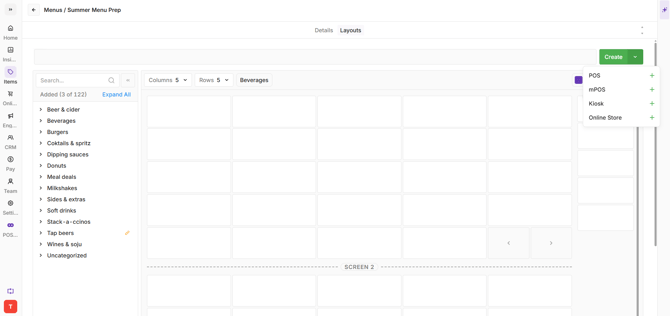
- Select the option to Create a layout.
- Select the relevant type of Layout; POS, mPOS, Kiosk or Online Store
- Enter a Name, such as Dining Room POS.
- Select a pre-existing layout to copy from, where available and relevant.
- Select Create.
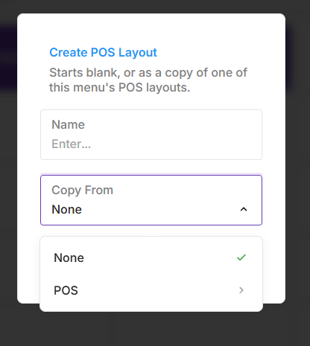
Step 4. Manage Pages in a POS Layout
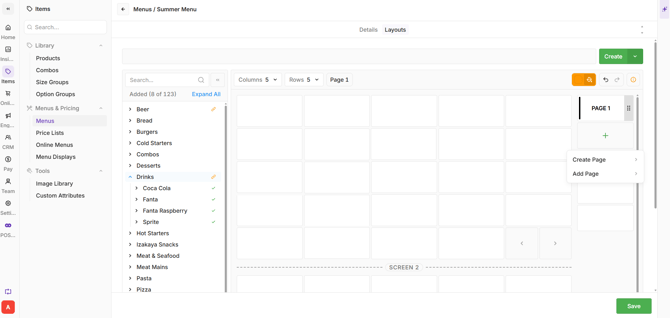
Pages organise products within a POS layout. A new layout includes a default page named Page1, which can be renamed or configured. Additional pages can be created to group products by category or service area.
Back Office > Items > Menus & Pricing > Menus > Layouts
Add a Page
- Open the required menu and select the Layouts tab.
- Select one of the blank Page tiles.
- Select Create Page.
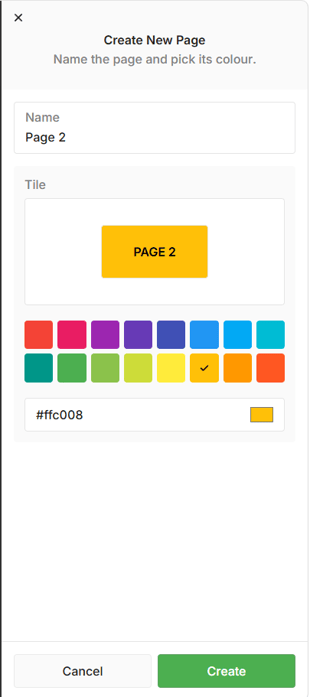
- Enter a Name, such as Coffee & Tea.
- Select a Colour, if required.
- Select Create.
Resize the Layout
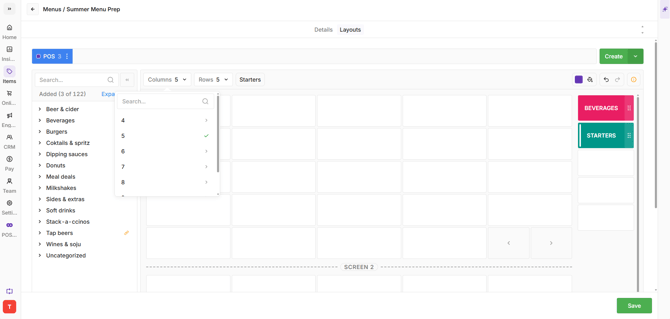
The number of rows and columns can be adjusted to change the number of available product tiles.
- Locate the layout size drop-down controls.
- Select the required number of Columns.
- Select the required number of Rows.
- Select Save.
Edit a Page
- Hover over the page heading, such as Page1.
- Select Options (...).
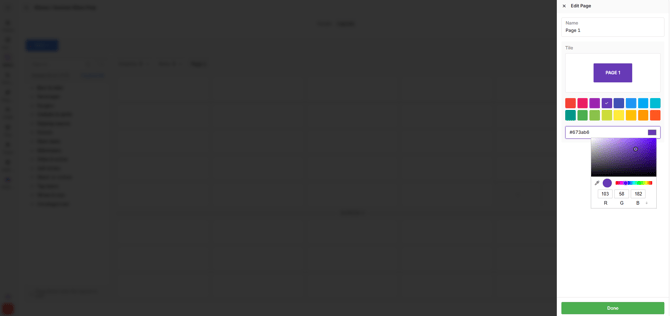
- In the Edit side drawer, update the Name.
- Select a colour from the predefined palette or choose a custom colour.
- Select Done.
Reorder Pages
- Locate the page to move.
- Select and hold the drag handle on the right-hand side of the page tile.
- Drag the page up or down to the required position.
- Release the page to place it in the new position.
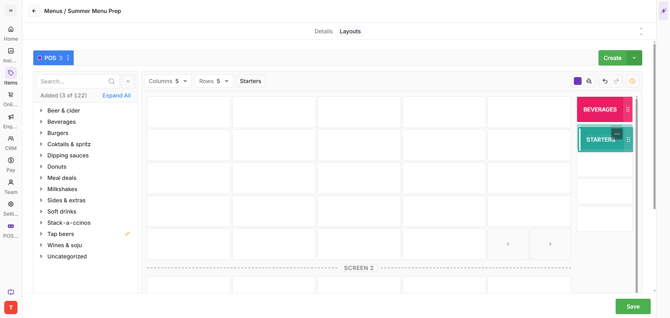
Note: Changing the colour on a Page tab does not assign the colour to the product tiles.
Step 5. Add Products and Categories to a Layout
Products can be added to a layout individually or by category. Either method can be used independently, or both methods can be combined to create the required layout.
Option 1. Add Individual Products
Use this option to add individual products or specific product sizes to a layout.
Standard Product
Add a product to a layout tile with all its configured sizes. When selected on POS, the available sizes are displayed for selection.
- Open Back Office > Items > Menus & Pricing > Menus.
- Select the menu to configure using the > beside the menu.
- Open the Layouts tab.
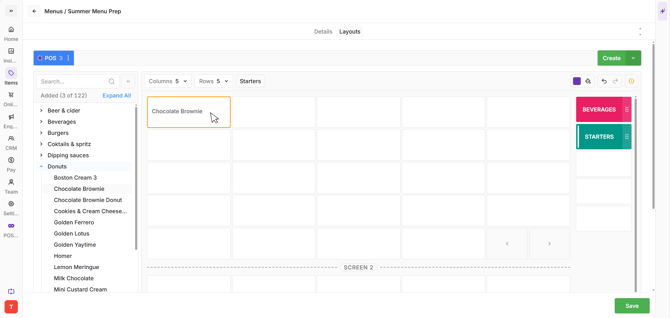
- Navigate the Product Tree or use the search field on the left to locate a product.
- Select and drag the product to the required tile.
- Repeat to add all required products.
- Select Save.
Standard Product with Excluded Product Sizes
Use this method to add a product while excluding sizes that should not be available from the layout.
- Locate the product in the Product Tree or use the search field.
- Select and drag the product to the required tile.
- Select the product tile to open the side drawer.
- Deselect any product sizes that should be excluded from the layout.
- Repeat as required.
- Select Save.
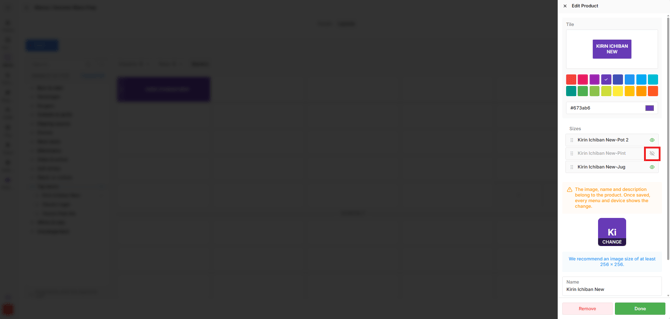
Product Size
Use this method to add a specific size of a product to a tile, for example, a large coffee.
- Locate the product in the Product Tree or use the search field.
- Expand the product using the > to view the available sizes.
- Select and drag the required size to a layout tile.
- Repeat as required.
- Select Save.
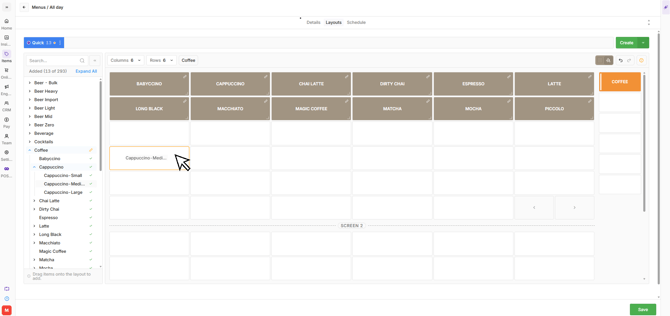
Option 2. Add Products by Category
Use this option to add multiple products from a category or create a linked category page.
- Open Back Office > Items > Menus & Pricing > Menus.
- Select the menu to configure using the > beside the menu.
- Open the Layouts tab.
- Navigate the Product Tree or use the search field on the left to locate a Category.
- Select and drag the category to the required tile.
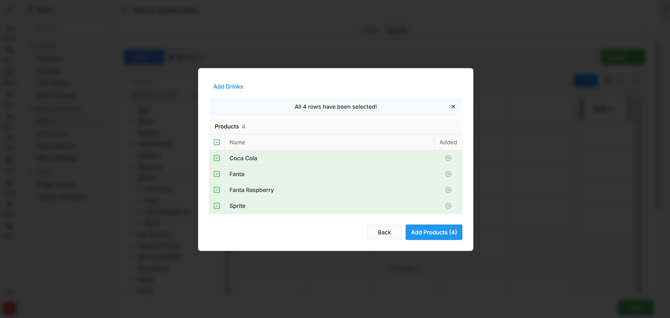
- Select one of the following:
- As a Page: Creates a single tile that opens a new page containing the products within the category. The layout updates automatically as products are added to or removed from the category.
- As Products: Creates a separate tile for each selected product within the category.
- If As Products is selected, deselect any products that should not be included in the layout.
- Select Add Products.
- Select Save.
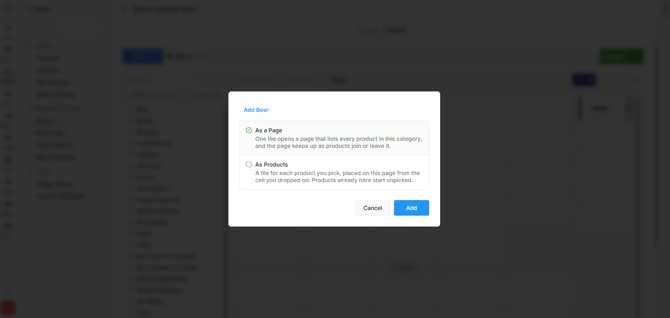
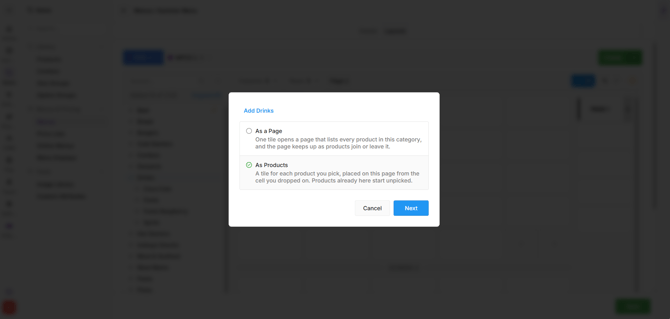
Step 6. Edit Product Tiles
Product tiles can be moved, resized and customised to suit the layout. Tile colours can be changed individually or in bulk, while product information can be updated through the editing side drawer.
Back Office > Items > Menus & Pricing > Menus > Layouts
Move a Product Tile
- Select and hold the drag handle on the left-hand side of the product tile.
- Drag the tile to the required position.
- Repeat as required.
- Select Save.
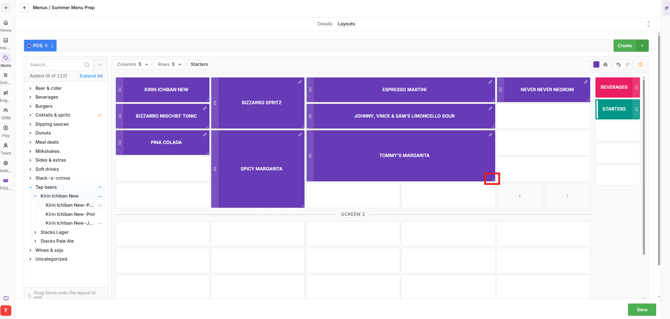
Resize a Product Tile
- Locate the tile to resize.
- Select and hold the L-shaped resize handle in the corner of the tile.
- Drag the handle to the required size.
- Release the handle to apply the new size.
- Select Save.
Edit Tile Appearance and Product Details
- Select the product tile to edit.
- In the side drawer, configure the required fields:
- Colour: Select a predefined colour or choose a custom colour.
- Image: Change the image associated with the product.
- Name: Update the product name.
- Description: Add or edit the product description.
- Save the changes.
Change the Colour of Multiple Tiles
- Select the colour bucket above the pages column.
- Choose the required colour.
- Select each tile to apply the colour.
- Deselect the colour bucket when finished.
- Save the changes.
Important: Changes to a product's Name, Image or Description are reflected wherever that product is used, including other menus and ordering channels. For example, changing a product image in a POS layout also updates the image used for Online Store ordering.
Step 7. Remove Products from a Layout
Remove a Single Product Tile
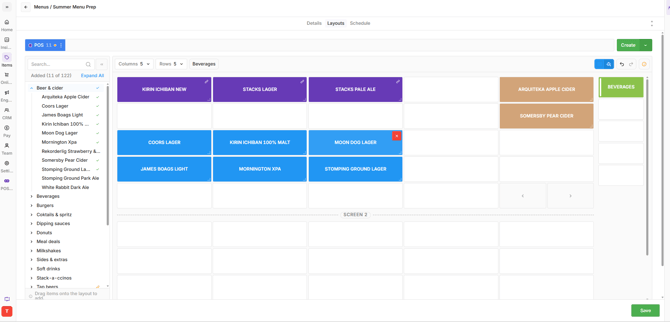
- Hover the product tile and select X.
- Select Save.
Remove a Category
- Locate the Category in the Product Tree.
- Select the link icon beside the Category.
- In the Unlink from Layout confirmation, select Unlink Category.
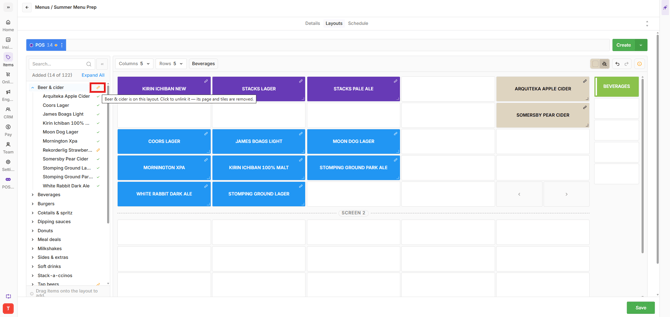
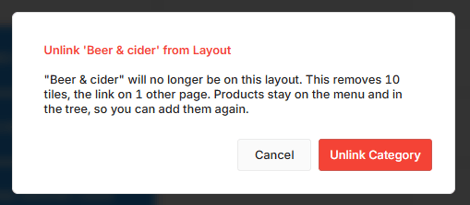
Select Save.
Remove a Product linked by a Category
A product added to a Layout by linking a category may only be removed if the category was linked as products.
If the Category was added as a Page, the individual products cannot be removed.
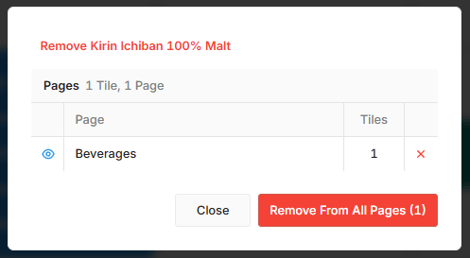
- Locate the Product in the Product Tree.
- Hover over the green Tick next to the product.
- If eligible for removal, a red X will be displayed, select the X.
- Review the confirmation message and select Remove From All Pages.
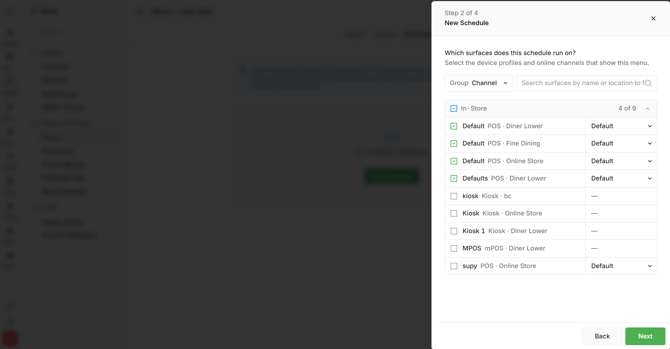
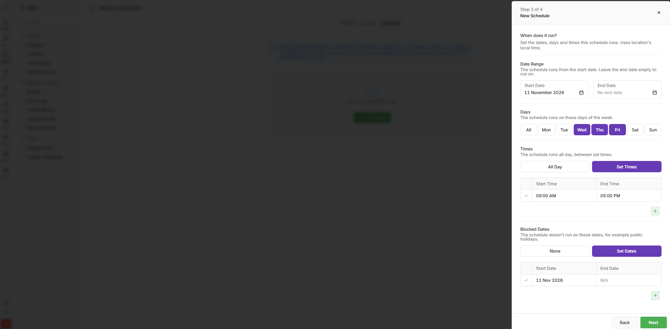
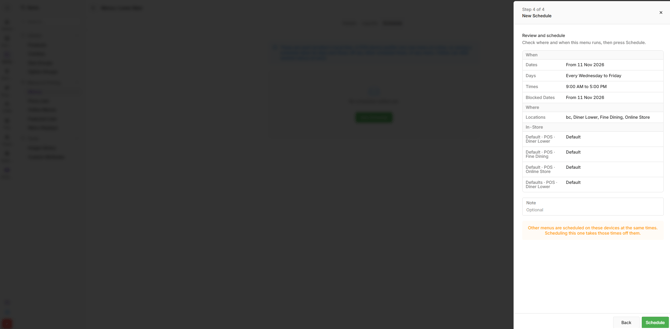
Step 8. Schedule a Layout
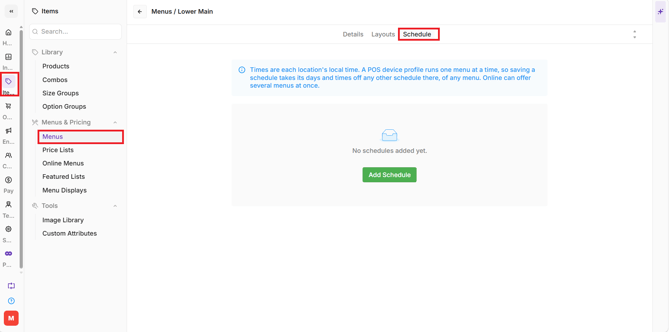
Each Layout in Oolio One can be scheduled to be active at different locations and at different times.
- Open the Schedule Tab.
- Select Add Schedule.
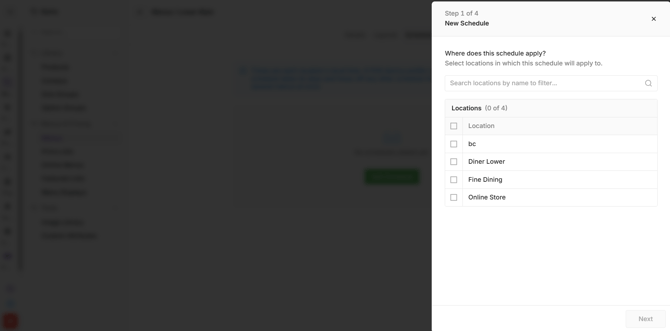
- In the side drawer, select the Location(s) to be scheduled.
- Select Next.
- Select the Devices to be included in the schedule.
- Select Next.
- Enter the Dates and Times for the schedule to run.
- Select Next.
- Review the Schedule and select Schedule.
Additional Layout Functions
The Layout includes additional tools for locating products, reviewing products not included in the layout and managing existing layouts.
- Locate a Product: Find the product in the Product Tree and select the eye icon. The layout opens the relevant page and highlights the product tile in blue.
- View Products Not on the Layout: Select the orange information icon in the top-right corner of the layout screen to view products available at the location that have not been added to the layout.
- Rename or Duplicate a Layout: Select the layout tab above the Layout Builder to access the rename and duplicate options.