Oolio Tags links QR codes to Sections and Tables in Oolio One so customers can scan a code and start an Online Store order with the correct table details. QR codes can be assigned individually or across multiple tables, making setup faster for Locations with larger table configurations.
Before starting
Before configuring Oolio Tags:
- Install the Oolio Tags app on the iPhone or iPad that will be used to scan and assign QR codes.
- Configure the required Locations, Sections, and Tables in Oolio One.
- Have the QR-code tags for the Location ready to scan.
- Identify which QR code will be used at each physical table.
- Have the Oolio One login credentials required to access the Oolio Tags app.
Step 1: Sync Sections and Tables
Sections and Tables must be configured in Oolio One before they can be used with Oolio Tags.
See 🔗 Configure Sections & Tables for setup instructions.
- Log in to Oolio One Back Office.
- Open Settings.
- Select Tags from the left-hand navigation.
- Under POS Brand, select Oolio POS.
- Select Get Tables.
- Confirm the required Sections and Tables are displayed.
- Select Submit.
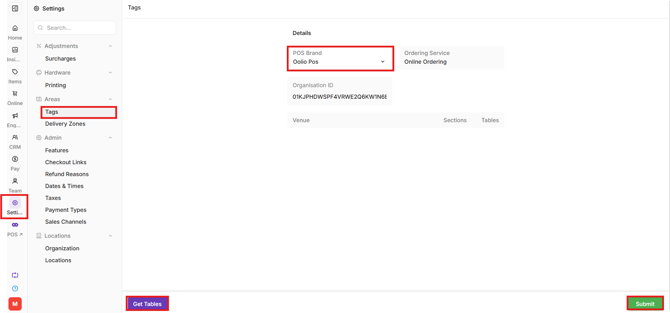
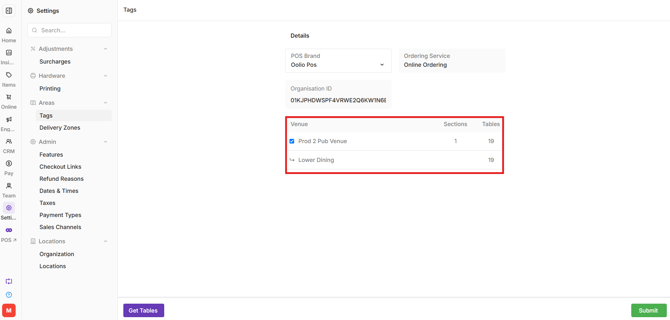
The sections and tables are now available for use with Oolio Tags.
Important: After creating or editing Sections or Tables in Oolio One, return to Settings > Tags, select Get Tables, then Submit to update the configuration used by the Oolio Tags app.
Step 2: Install the iOS Oolio Tags app
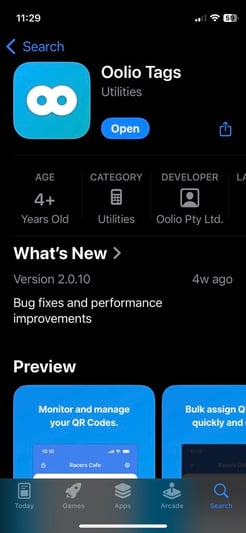
Install Oolio Tags on the iPhone or iPad that will be used to assign QR codes.
- Open the App Store.
- Search for Oolio Tags.
- Select Get.
- Follow the prompts to install the app.
Step 3: Select a Section
- Open Oolio Tags.
- Log in using the same credentials used for Oolio One Back Office.
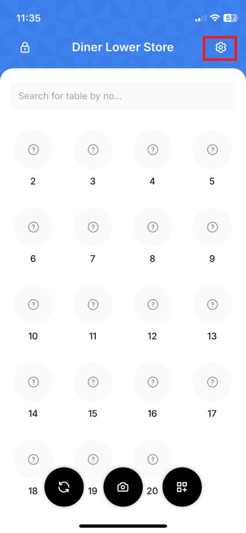
- If more than one Section is configured, open the Settings icon and select the required Section.
The Tables configured for the selected Section are displayed.
Step 4: Assign a QR code
QR codes can be assigned to a single table or assigned across multiple tables in sequence.
Assign a QR code to a single table
- Select the required Table.
- Select Start Scanning.
- Point the device camera at the QR code.
- Wait for Oolio Tags to identify the code.
- Select Confirm.
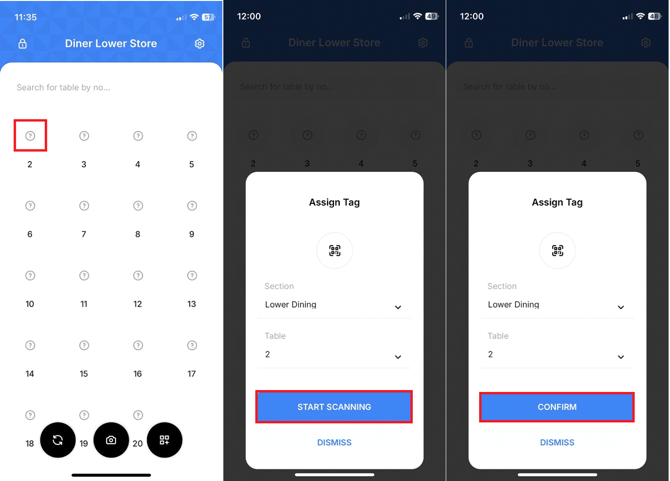
The QR code is now assigned to the selected Table.
Assign a QR code using the Camera icon
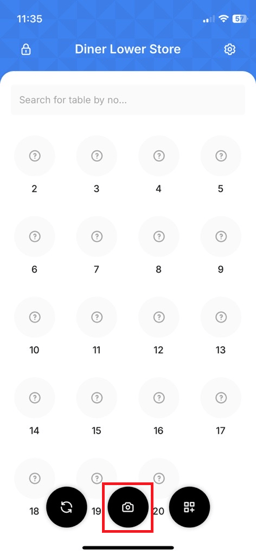
The Camera icon can also be used to scan a QR code first, then confirm which Table it belongs to.
- Select the Camera icon.
- Point the device camera at the QR code.
- Wait for Oolio Tags to identify the code.
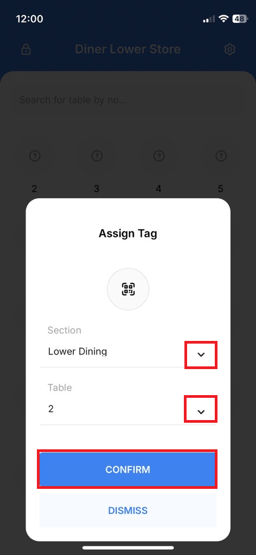
- Review the Table displayed by the app.
- If required, use the Table dropdown to select a different Table.
- Select Confirm.
Step 5: Assign QR codes to multiple tables
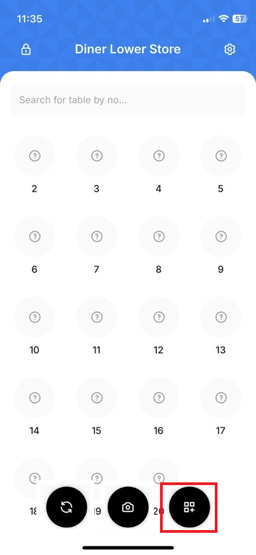
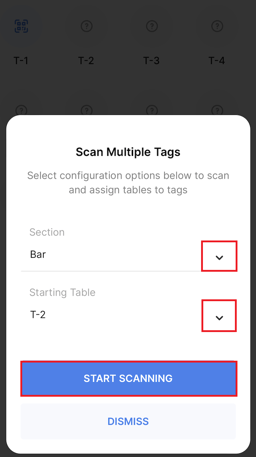
Use Multi Assign when several QR codes need to be assigned to Tables in sequence.
- Select the Multi Assign icon.
- Confirm the displayed starting Table is correct.
- If required, select a different Section or Table from the dropdowns.
- Scan the first QR code.
- Wait for the prompt to scan the next QR code.
- Continue scanning the QR codes in order.
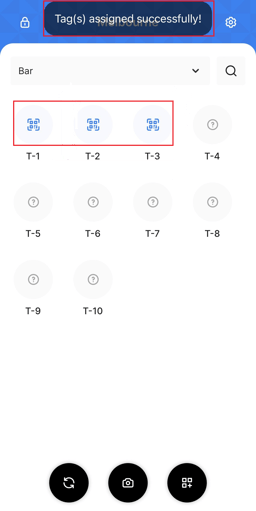
- Select Finish Scanning when all required codes have been assigned.
- Review the Tables and confirm the assignments are correct.
Step 6: Unassign a QR code
Unassign a QR code when it is no longer required at a Table or needs to be moved to another Table.
- Open Oolio Tags.
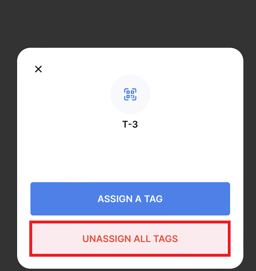
- Select the Table containing the QR code assignment.
- Select Unassign All Tags.
If the QR code needs to be moved, assign it again using the single-table assignment workflow.
Step 7: Refresh Oolio Tags data
Refresh Oolio Tags after changes have been made to the Tags configuration.
- Open Oolio Tags.
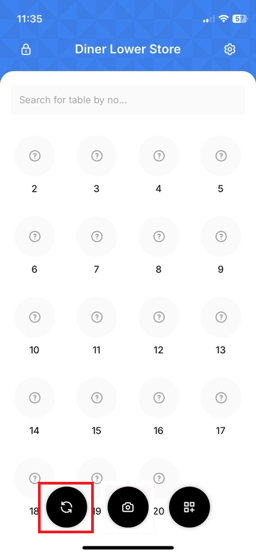
- Select the Refresh Data icon.
- Confirm the latest Sections and Tables are available.